The Day I Dreamt About Has Come

My current daily job requires producing about 50-60 minutes of content per month of something that roughly falls into mostly unscripted reality show. Within 30 days we have to prepare the final edit, sound mix, including voice over and music, motion graphics, any potential VFX shots, mostly cleanups, and finally some rudimentary grade and DVD authoring. The time is precious, and short. And sometimes changes have to be introduced a day before, or even on the mastering day.

see more

Exploring Temperature and Tint

When dealing with footage which was shot at improper white balance, and trying to correct it, I sometimes wished that Premiere had the temperature slider present in Camera Raw or in SpeedGrade. When a friend expressed similar concern, I decided to take my shot at it. After all, it should be relatively simple, right? It’s only moving the pixels towards blue or orange, and in the case of tint, towards magenta or green.

I even found a sample approximate algorithm to calculate the white point at a given temperature, and almost ended up using it. However, after reading on how the proper mixing requires conversion to HSL colorspace due to change in luma value of each pixel, I decided to explore the issue in more detail. It turns out, like with many other issues, that there are differences on what “temperature” exactly means in various software packages. Consider the following images:

original

Original image.

camera-raw-temperature

Camera Raw/Lightroom temperature adjustment set to -100. The image is brighter, and the tint is much stronger, washing out the shadows.

speedgrade-temperature

SpeedGrade’s temperature adjustment at -1.0 (equivalent of -100). The shadows are not washed out, although the image is darker due to clipped blue channel.

Clearly, Camera Raw is brightening the image, and almost looks like it is trying to mix the blue or orange solids with the picture. Perhaps similarly to what Tanner Helland described in the comments to his algorithm, but without the attempt to retain luminance. I find this adjustment not so great, especially for images with rich shadows that get washed out in the process.

On the other hand, the blacks in SpeedGrade are untouched, and it seems that the temperature/tint sliders operate only as gain adjustments, multiplying red and blue (temperature) or all three (tint) channels at the same time by roughly the same amount, and leaving the luma mostly intact except for the places, where the blue channel is clipped.

I even explored playing with gamma on the a and b channels in Photoshop L*ab color space, which directly code the interesting information (a is the tint scale, b is the temperature scale), but these were also not as satisfying as SpeedGrade’s. In the end, I decided to stick with the color correction software.

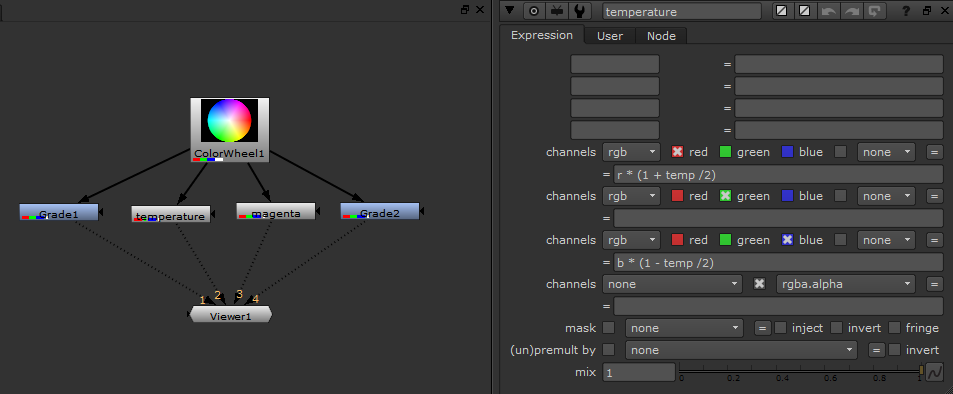
I experimented for a moment with the formulas and values, but in the end, I turned to Nuke to find how it resolves the issue, because it does provide an immediate numerical output. Finding out the exact adjustments was quite easy. Using grade and expression nodes I was able to mimic what Nuke was doing during temperature or tint adjustments, and came up with very simple formulas.
nuke

A very simple setup in Nuke allows to find the proper formula for handling temperature and tint adjustments to mimic SpeedGrade’s controls.

Implementing them as a plug-in for Premiere was relatively uncomplicated, and took me less time than writing the documentation for it. In fact, I was also able to successfully tackle OpenCL acceleration as well, but this will be incoming in the paid version some time in August.

Dr SG, or How I Learned to Love SpeedGrade…

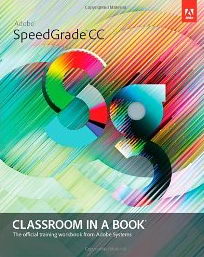
sgSome time ago I mentioned that due to certain turn of events I ended up learning more about SpeedGrade than I ever expected. Since the cat is out of the bag now, let me elaborate. I was contacted – of all days on April 1st – with an offer to become the technical editor for the “Adobe SpeedGrade CC – Classroom in a Book” book authored by none other but Alexis van Hurkman himself.

After making sure that it was not April Fool’s Day joke, I was happy to accept the job. It turned out to be a great experience. Granted, Alexis is an experienced technical writer, so I ended up having very little input, but the side effect was that I learned SpeedGrade from top to bottom – something that would most likely never happen otherwise.

Regardless of my still present love for Resolve, I ended up appreciating several nifty features that SpeedGrade does have. The shortcuts to quickly adjust the interface, the ability to create grading layers spanning over several clips, quick adjustments for tonal ranges (shadows, midtones and highlights) really emphasize the “speed” part of the application.

Of course, the limitations which I described before still apply, and Resolve is still king when it comes to power windows, tracking, secondary selections and automatic grade management. But SpeedGrade definitely has potential, and from what I know, it is not going to go to waste.

I’d like to thank Senior Editor Karyn Johnson for the opportunity to be part of the team, and sincerely recommend the book to anyone interested in learning SpeedGrade. And if you are a Premiere CC user, you might need it sooner than you think. Be prepared.

Warning about using RGB and Luma Curves in Premiere Pro CC

Update: The 7.1 version due out in October is going to fix the issue altogether. Great job, Adobe!

Update: The 7.0.1 patch for Premiere Pro CC fixes some of the below mentioned issues, although unfortunately not all of them.

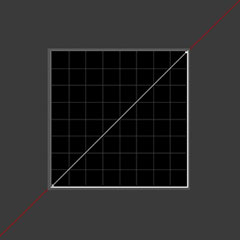
To my great chagrin Premiere Pro CC changed the way curves operate. Right now the curves, both RGB, and Luma, clip the superwhites and superblacks, and there is no interpolation going on after the curves hit 0 or the white level (255 or 1.0). In CS6, the curves followed the general slope, and it was possible to recover some of the “overshot” material. Right now, if you stick to curves, all clipped data is lost.

cs6

Curve's interpolation in Premiere Pro CS6 allowed to recover superwhites or superblacks, and correct the contrast in the same instance.

cc

Premiere Pro CC clamps all superwhites and superblacks, and recovering the detail is not possible with the use of RGB or Luma Curves.

This is completely new, unexpected, and if you ever used curves, it changes your workflow dramatically, even if you don’t know it yet.

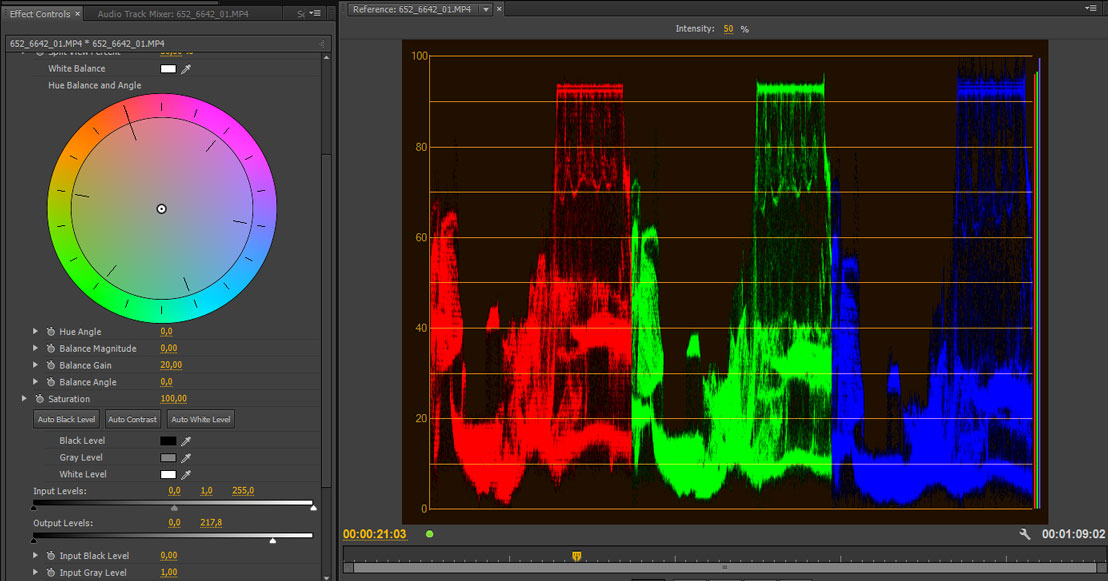
It means that you must remove the superwhites and superblacks from the clip before you use RGB curves. It means that if you were like me, using curves to apply the basic correction and contrast in one go, you cannot do it now. You have to first make the signal “legal” – reduce the superwhites and raise the superblacks with for example Fast Color Corrector, so that they fit between the range that curves operate on – RGB scale that is not overshot in either direction, even if you are working in the floating point (max bit depth).

fcc

In Premiere Pro CC you need to use Fast Color Corrector or Three-Way Color Corrector to bring the superwhites back into the RGB scale. Only then you can apply curves, and be sure that you are not loosing data.

It also means that there is no real backwards compatibility within the projects that used curves. Your colors will not be the same, if you had any superwhites in the project. I highly advise you to finish your current projects in CS6, and only then create the new ones in CC, being mindful about the necessity to use Fast Color Corrector before applying curves.

Adobe is aware of this issue, and hopefully some fix will come soon, but while using CC 7.0.0 version of Premiere you need to remember about this very real problem.

I stand corrected…

In an excellent recent article on Pro Video Coallition Alexis van Hurkman explained how the terminology which I use in my Power Window filter, and in my Lift, Gamma, Gain tutorial is incorrect. The control called “Lift” should in fact be called “Offset”, based on the way it works.

Similarly, the formula which I used to calculate the resulting pixel value in the filter is also a bit different than the approved ASC CDL standard. In my case I decided to apply the power function (gamma) to the input value of the pixel, and the CDL order applies gamma as the last operation, affecting the result of the offset and gain corrections. Come to think about it, it makes a bit more sense than the way it is implemented now, especially for the footage which was shot in log space. If you set your black (offset) and white (gain) levels, you don’t want them to move, when you change the midtones (gamma).

Perhaps for the compatibility sake I should add another (sigh…) control where the user would be able to choose between color calculations, but after giving it some thought, I will definitely correct the order of operations in the next release of Power Window plugin.

NAB Special – SpeedGrade revisited

Today at NAB Adobe revealed the next version of their video tools. From my perspective, the most interesting developments happened on the Premiere Pro front, and the next note will deal exactly with that. As of now, let’s take a look at another promising part of the suite – the new SpeedGrade.

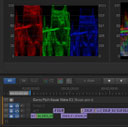
SpeedGrade interface in its full glory. Quite a lot of things are going on, and certainly it’s an improvement over the previous version to have these panels all on a single screen.

Courtesy of Adobe development team I had an opportunity to take a sneak peak at the pre-release version. I played with it long enough to see how much of my integration wish list has been adressed, and I have mixed feelings about it:

  1. Monitoring on different hardware – half check. Right now it’s possible to get the output on AJA and Matrox devices, or the second monitor. Bluefish and Blackmagic (which I’m personally the most interested in) support still remains vague.
  2. Control surfaces – half check. Tangent Elements is supported, but Avid Artist not so much. I’ve been considering buying one for some time, so it’s again a mixed blessing. The “virtual trackball” behavior for tablets, most likely an attempt to simulate the behavior of actual trackballs, is something that personally I’d be glad to turn off, and perhaps then it would be easier to actually use the software with Wacom.
  3. Premiere Pro integration – not as of now, but the newest version of Premiere has tightly integrated “Lumetri effect” which allows one to apply a look from SpeedGrade to any clip on the timeline. Will the release version of SpeedGrade be able to read Premiere projects and apply the effect? And then read it back for round-tripping? We shall see.
  4. File support – half check. What might break it all down is the fact that not all file formats that Premiere supports, are supported by SpeedGrade. I use XDCAM EX on a daily basis, and this is not supported. Granted, it’s also not supported by Resolve, so I’d be inclined to do the transcoding.
  5. XML import and export – nope. Hopefully it is amended by feature number 3 at certain point, but on the other hand, implementing it might be a tad easier.
  6. More Adobe-like UI – half-check. A few tweaks to the interface here and there, some unification of the icons, but we’re still in a bit different world. Granted, it’s not that important an issue, UI can be learned, and should be dictated by the needs of the application, and in this regard the flexible layout of SpeedGrade has a distinct advantage over Resolve or other applications.

You can quickly turn on and off the panels, to focus on the actual footage that you intend to grade.

As you can see most of the issues have been addressed in some manner, so there certainly is some progress, although for the seamless integration into the pipeline we will still have to
wait. It is kind of disappointing, especially after seeing how Premiere changed within past year. Certainly the goal of creating the default color grading application for Premiere editors remains unachieved.

Unfortunately as of today, mostly due to the points 1 and 4, the ease of use, and the number of available features, Resolve Lite still remains my software of choice, unless I’d be grading in 2K or higher, which currently I’m not. I wish SpeedGrade team all the best in their efforts, and I shall monitor their progress with interest, waiting for the moment when I can use the software for one of our productions.

There has also been an interesting development for me in terms of SpeedGrade, but right now I am not at liberty to say anything more than I will most likely learn this software much better than I ever wanted to at present moment. Life goes mysterious ways.


Applying the Power Window effect

I’ve been both terribly busy and sick lately, thus the lack of the tutorial last week. Hopefully, something interesting will come out of my business next week, and I would advise you to follow my blog during NAB, if you are interested on my take on a few things that might come up there.

But until then, here is this week’s tutorial: