Summary: Always apply your 8-bit effects as the last ones in the pipeline.
A few years ago Karl Soule wrote a short explanation of how the 8-bit and 32-bit modes work in Premiere Pro. It’s an excellent overview, although it is a bit convoluted for my taste (says who), and does not sufficiently answer the question on when to use or not to use 8-bit effects, and what are the gains and losses of introducing them in the pipeline. Shying away from an Unsharp Mask is not necessarily an ideal solution in the long run. Therefore I decided to make a few tests on my own. I created a simple project file, which you can download and peruse ( 8-bit vs 32-bit Project file (1754 downloads ) ).
In essence, the 32-bit mode does affect two issues:
- Banding.
- Dynamic range and clipping.
For the purposes of testing them, in a Full HD sequence with Max Bit Depth enabled, I created a black video, and with a Ramp plugin I created a horizontal gradient from black to white, to see how the processing will affect the smoothness and clipping of the footage.
Next I applied the following effects:
- Fast Color Corrector with Input White reduced to 215 (clipping white).
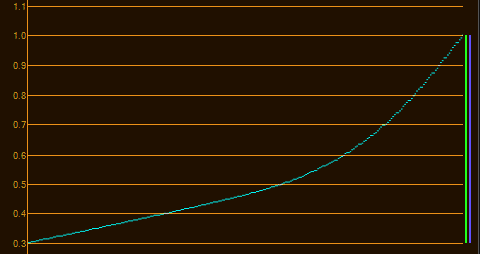
- RGB curves that roughly mirrors the Gamma 2.2
- RGB curves that is roughly the reverse of 2.
- Fast Color Corrector with Output White reduced to 215 (bringing white back to legal range)
- Offset 8-bit filter that does nothing, but breaks the 32-bit pipeline.
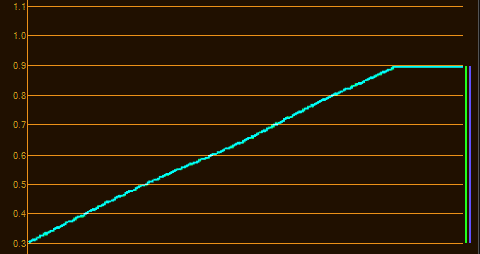
To assess the results I advise opening a large reference monitor window in the YC Waveform mode. Looking at Program monitor will not always be the best way to check the problems in the video. You should see the diagonal line running through the whole scope, like this (note, that the resolution of Premiere’s scopes is pretty low BTW):
Now perform the following operations, and observe the results:
- Turn off the effect number 5 (Offset), and notice a bit more smoothness in the curve, however it’s rather superficial, and hardly likely to influence your final delivery.
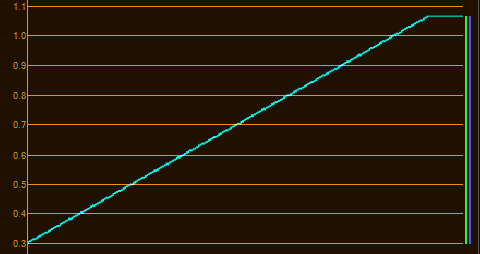
- Turn on Offset, and move it before the second FCC. You should immediately see the clipping in the highlights. This is the result of 8-bit filter clipping the values at 255,255,255 (white), and disposing of all super-white information that the first FCC introduced.
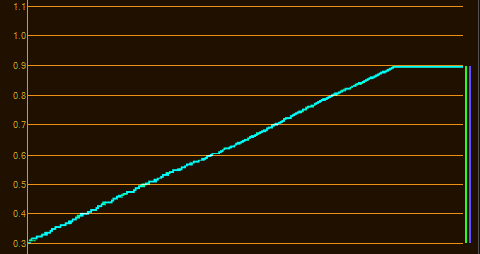
- Move offset between RGB curves (between 2 and 3). Apart from the clipping, you will also notice the banding and posterization, both in the program monitor, and in the Waveform as little flat steps. This is the result of 8-bit filter rounding up or down the values to the nearest integer (123.4 is rounded to 123), and later modifications have less data to work with.
- Move offset before the first FCC. Most likely you will not see anything too different from when the Offset filter was the last one applied. However, if you had footage that had super-white values, they would be clipped and irrecoverable. Similarly, if you had 10-bit footage, it would have been converted to 8-bit, and all latitude and additional information would be lost as well.

All filters on with Offset before the second FCC. 8-bit filter makes the data irrecoverable, and clips the highlights.

All filters on with Offset between the RGB Curves. Notice the irregularity in the curve, showing rounding errors and compounding problems.
This simple experiment allows us to establish following best practices on applying 8-bit effects in Premiere Pro:
- Try to apply 8-bit effects as the last ones in the row, especially with footage that is 10-bit or more.
- Always perform your technical grade and make your image legal (ie. not clipping) before you apply any 8-bit effect in the pipeline.
- Ideally do all your color correction before any 8-bit effect is applied.
- Avoid performing heavy color correction or image processing after an 8-bit effect has been inserted to avoid banding and posterization, especially with 10-bit or RAW footage.
And that’s it. I hope this sheds some light on the mysteries of Premiere Pro’s 32-bit pipeline, and that your footage will always look great from now on.


Pingback: Linkage Wednesday | Miguel Cobo