

Disclaimer: Blackmagic Design was kind enough to supply me with a full version of Fusion Studio to check out the latest features. It most certainly influenced this article, but I believe you will find it interesting regardless.
While taking part in 48 Hour Film Project I did have an opportunity to use the latest version of both Resolve and Fusion, and I want to share with you this interesting experience of rapid post-production.
At first I wanted to do the whole process in Resolve from ingest to finish to save time on interchange. The initial tests were very promising, but it turned out that we need to incorporate an Avid editor into our workflow. This threw a major wrench in our gears, but we still ended up with a short that won the best actor and the best role concept.
Resolve
During initial tests I happily found out that Resolve did manage to run pretty reliably on my 2012 Retina MacBook Pro with just 1 GB of video RAM. If you remember my previous review, it struggled a lot at that time. Now I was able to get a real time playback for HD Sony F55 raw files, even with basic grade applied. Great performance optimization, congratulations, it definitely makes Resolve even more accessible.

Editing in Resolve 12.5 is a bit smoother than in Resolve 12.0, though still not as fluid as in any other NLE.
Of course, 1 GB of video RAM is not enough for 4k footage. It should be obvious from reading the manual, but still, having Resolve abruptly quit on me without any warning was disappointing. I understand problems with GPU development, it still makes for not such a great experience. Hopefully this is something that gets addressed in the future.
I experienced another inexplicable crash when in the heat of things I attempted to import an aaf file from Avid with mixed frame rates on the timeline. For some reason, I finally had to open it in Premiere and save it as an XML. There must have been something wrong with that particular Avid timeline, as we also later had issues exporting omf from it. Of course, initial tests went great, and other aaf files were accepted without problems. It was only this particular sequence at that time. Nothing to jack up my stress levels like errors during interchange on a tight deadline.
Other than that, the program was stable, and served quite well as proxy transcoding, grading, and finishing station. Grading toolset is amazing, and nothing to complain about. Even version 9 was fantastic, and what we are having now will satisfy needs of everyone with perhaps very few exceptions. I must say that I find Resolve color management especially useful for editors, as it’s possible not to see flat log files during edit, and the risk that a director becomes married to this washed-out look is much lessened.
Delivery room takes a while to get used to, though, and is not as straightforward. I definitely recommend that you do save your presets once you create them. You don’t want to find out after spending three hours transcoding, that instead of DNxHD 36 proxy codec Resolve defaulted to DNxHR444 with 200 mbps and that you have to transcode material all over again. Or that you did not export 5 seconds of black in front of the movie and the clock is ticking, because delivery should happen within half an hour.

Resolve is quick to do exports, but preset creation could be more intuitive.
When it comes to the editing experience, I still find it not on par with any dedicated NLE. Yes, you can edit. Yes, you can do a lot of things, and if you are not an experienced editor, you will most likely be happy with the performance and feature set. But when you switch to Resolve from another application that you know well, be prepared to complain a bit. I am certain though, that my original plan of editing and finishing the whole project in Resolve was absolutely feasible and in the end would have saved us tons of time on transcoding proxies, and troubleshooting interchange, despite it not being the fastest editor on the planet.
It was also an interesting experience – me cutting on Resolve, and another editor working on Avid. Syncing dailies – while not an intuitive task – was definitely much faster, as was working with multicam. But trimming, choosing footage, timeline manipulations were not as fluid. Some of it I can blame on my inexperience with Resolve, but there were some kinks such as switching between panels, deselect key not working unless I clicked on the timeline, and a few other rough edges which several times made me seriously consider firing up Premiere to finish the edit.
Perhaps the most annoying is that obtaining real-time playback throughout the whole timeline once the grades are applied can still be a hit and miss thing, if you are not sitting on a high-performance desktop or workstation. There are numerous workarounds, but all of them are a few clicks away. Perhaps it’s my inexperience speaking again, but I really miss just hitting Return to render and play the timeline without hiccups. It’s so important for audio work, especially if you want to do syncing when the clips are already colour-corrected – which does happen.
One thing is certain: if you want to enjoy editing with Resolve, you need to customize the keyboard shortcuts, and you want to really familiarize yourself with the way various operations work when in selection mode and in the trimming mode. I don’t think the default set of keys is optimal, and I don’t think the FCP or Premiere sets are any better. To find what works best for you, will most likely require several trips to Keyboard Shortcuts editor. And don’t forget to hit Save after you’ve made your changes.

Keyboard Shortcuts Editor – this is the screen which you will become familiar if you intend to improve your own editing experience in Resolve.
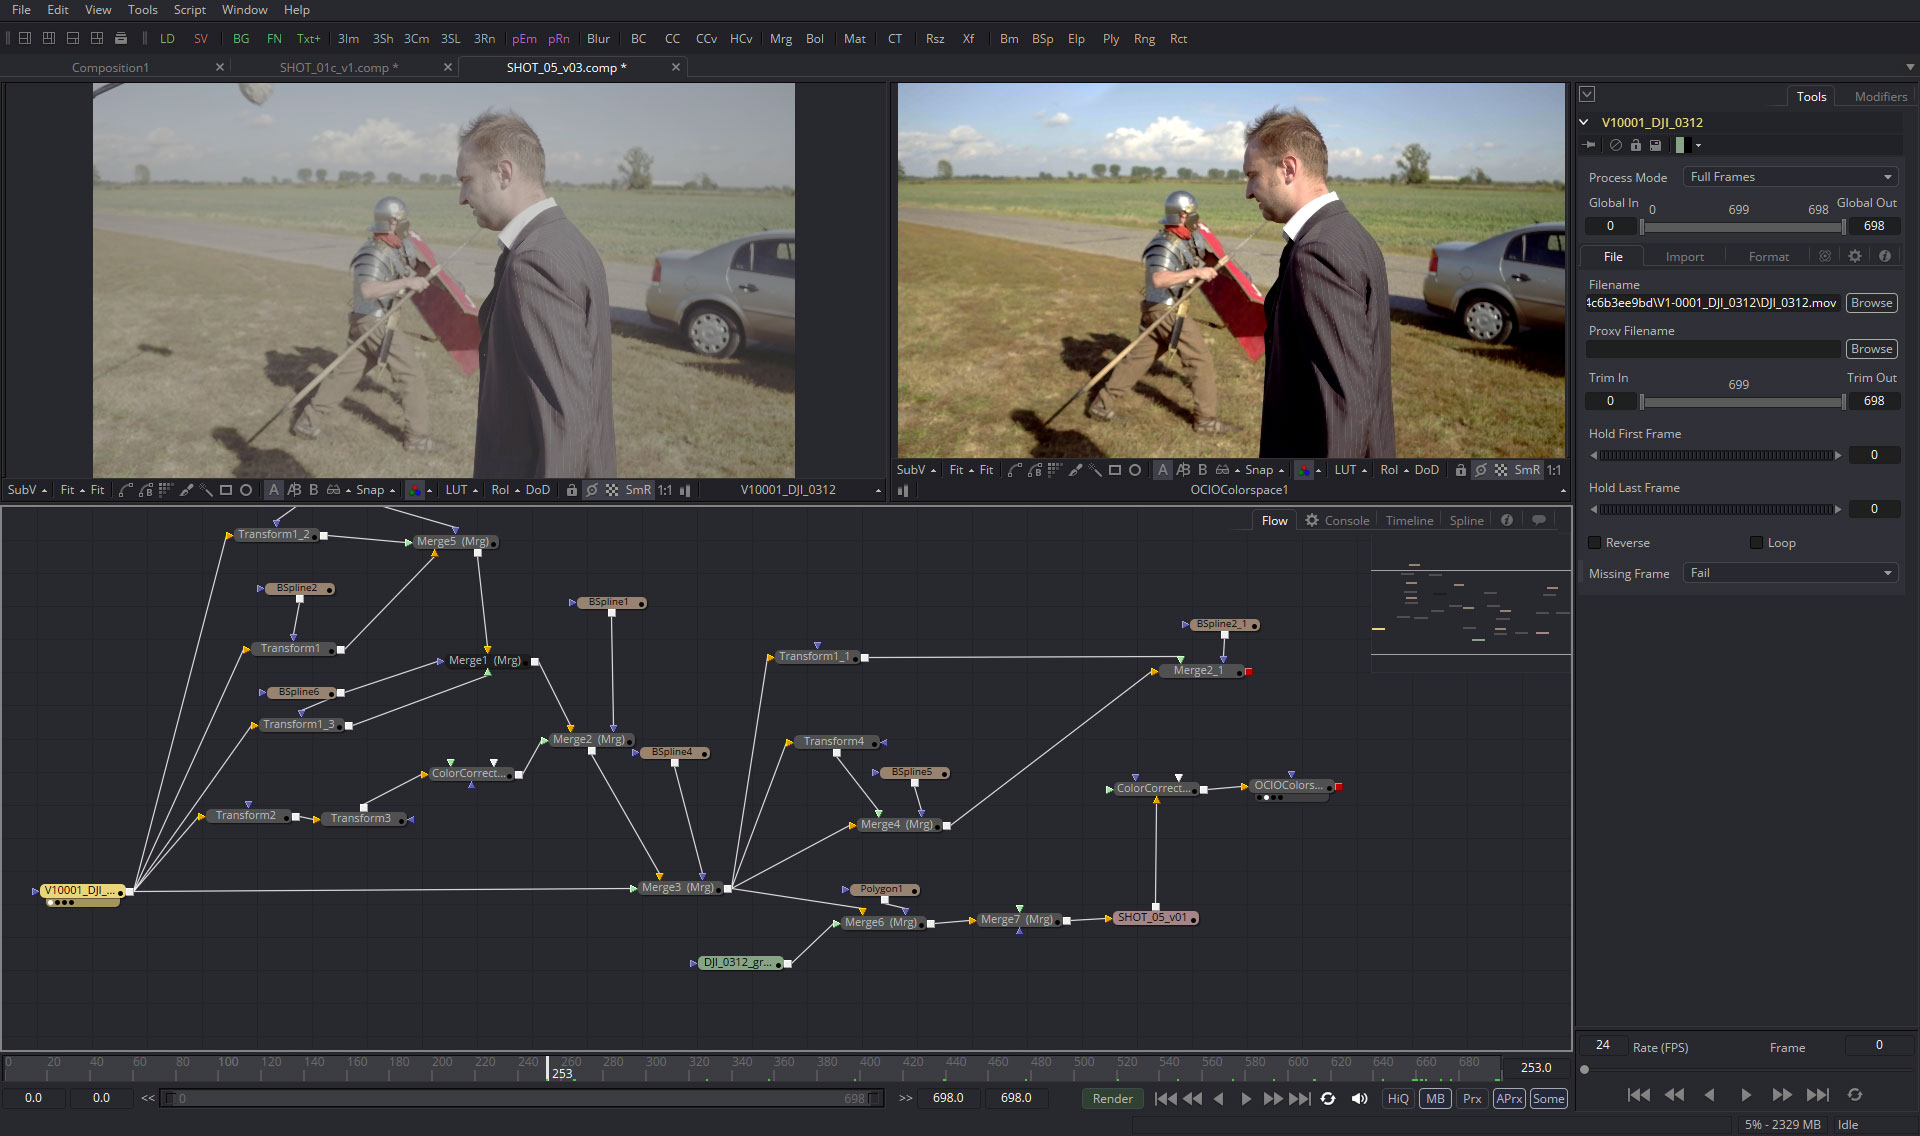
On the other hand, link to Fusion was definitely something that I appreciated a lot. We had two shots that required removal of boom or its shadow that appeared in the picture. Being able to just send them to Fusion, automatically transcode to a format that Fusion can read, and then manage versions, saved us precious time. It also worked without any glitches.
Of course, the functionality of this feature could be improved by adding ability for Fusion to read all formats that Resolve does, so that there is no need to transcode and downscale, if the source format is larger than destination. Another thing that I’m missing is the ability to add handles to the clip that is being replaced, and a possibility to create the linked clip on a layer above the source clip, without replacing it. But make no mistake – even the way it is now, it’s a great timesaver, and one of the most interesting feature of the recent updates.
Fusion
All in all I might have had spent more time in Fusion than I did in Resolve with that project. Remember the two boom removal shots? Well, they were not an easy piece of cake.
While Resolve is at the moment pretty familiar to most editors out there, Fusion is a completely different beast, and the interface – even after the latest facelift – is still esoteric at first glance. The learning curve is steep, and finding all the secret places you can visit is a long trip even after you think you know the software pretty well. And while Resolve training is prolific, there are very few Fusion tutorials out there.
Fusion is also nodal, but it is definitely more demanding and opaque than Resolve. Once you get a grasp of it, it’s a great VFX compositing application.
About the only thing that connects Resolve and Fusion though is the fact that they are both nodal and maybe a few common tools. But while you can get around Resolve without really understanding the nodal workflow (yes, you can), you won’t be able to work with Fusion at all. Fusion is all about what part of an image flows where, and what manipulations you apply to it. It might take a moment to get used to, before you can fly with it. Thankfully, I had done some work in it before, so I was not that much intimidated, and managed to do a decent job.
It was especially great to be able to run Fusion on Mac. This port took over a year, and is one of the best things that happened to this software to date. It is stable, I encountered no issues whatsoever. Granted, the work I’ve done did not push anything to the extreme, but still – the software seems solid.
While you can access most of Resolve features in its free version, unpaid Fusion perhaps will be of lesser value, because of the lack of Optical Flow and tools that rely on that, and scripting which helps with automation of numerous mundane tasks. Don’t get me wrong – you can still do some badass roto, compositing and 3D work without them. But I’m certain at some point you are going to say “oh, I wish I had it”. And this point seems to come much earlier in Fusion than in Resolve – at least to me.
Of course, I did wish to have a 3D tracker, and its lack did prove to be fatal for one shot – I was unable to pull it off 100%, because even Mocha failed to track it properly, it had to be fixed after the competition. But I understand that many new features are coming to Fusion pretty soon. I can’t wait. Other than that, it’s a piece of software that many vfx artists around the planet used to produce terrific work on Hollywood movies. It definitely needs more exposure and more training.
Generation
With Fusion Studio comes a piece of software called Generation, that you can use for shot review, version and artist management. We did not use it on such a small project, but most definitely this is something worth checking out, especially if you are a post supervisor. Too bad right now it only works on Windows.
Conclusion
Resolve is constantly growing and evolving, and the latest update was crucial in bringing in some performance optimization apart from a significant number of other features and improvements. It still has rough edges to iron out, and it takes time to get accustomed to its way of editing. It’s definitely a great choice if you want to avoid pains with interchange, even though sometimes there seems to be no escape from having a beefy machine to run it on.

Grading in Resolve has always been and remains one of the more pleasurable parts, especially if you have a control surface such as Tangent Ripple handy.
The link with Fusion and Fusion’s recent port to Mac OS helps to supplement Resolve’s rich feature set with vfx tools and even 3D environment if you need it. It definitely makes for a great combo for any do-it-all and jack-of-all-trades editors like myself, and these days aspiring vfx artists do not need to wonder how they can get their hands on Nuke or how to limit themselves to the toolset in After Effects.
There’s always room for improvement, but when isn’t there? It’s amazing to see where we are and compare it to five years ago.
Wishing you all a lot of fun and successful creative projects, I eagerly await Blackmagic following releases. They are definitely providing great service to the community.
Finally, here’s the link to our short, “Deferment”. Unfortunately at the moment available in Polish only, and without the subtitles:


Your video is very good in many ways. Can you tell me what camera and lenses you used for this?
Thank you. The scenes inside the car were shot with 2 Panasonic GH4s, as well as dismounted DJI Osmo. Outside we used DJI Osmo for some moving shots to get the benefits of stabilization, and Sony FS-7 for most of the other outdoor scenes. I’ll ask DP about the lenses, as I don’t have an idea. We were actually surprised with the quality that we got from Osmo.