I learnt image color correction in several stages. First was of course playing in RGB with scanned pictures. I used shareware Paint Shop Pro back in those days, which at some point was acquired by Corel. And it was cool, levels – or actually auto-levels – was all the buzz, as well as Hue and Saturation. Curves felt almost like magic. Then I took a desktop publishing course, read a few books, and learnt about CMYK and prepress. That was the first time I heard about color models, working with channels, as well as various issues that arose from incorrect conversions between various CMYK and RGB profiles.
For some time that was it. Then, as I begun to learn more about film and video, I discovered color spaces: various flavors of RGB, such as Rec601 and Rec709, but above all, YUV and by extension chroma subsampling. YUV was interesting, because luminance and chroma channels were separated. I toyed with it briefly, mostly doing contrast adjustments. Then Dan Margulis’ book “Photoshop LAB Color” book came out (now in 2nd edition), and that elevated my understanding to new levels. I had known a few tricks with Lab color space, mostly sharpening in the lightness channel, but through this book I got to know this space and its capabilities pretty well. I even used Photoshop Smart Objects to perform lossless conversions. It was not a great workflow, but it served its purpose. I thought I knew it all. I kept wondering why the video world did not make use of YUV, which is kind of similar to Lab.
When Lab finally began creeping into the world of film and video color correction (for example in daVinci Resolve), I felt I was well ahead of the game. It was hubris, of course, considering DCI P3, XYZ, ACES and everything that is being done to the so-called digital negative to make it look best in theaters, with which I had almost no experience. At some point I lost interest though. I felt I knew enough to keep me going, and that there was nothing new under the sun. When the LUT craze came not so long ago, I was unmoved. 1D LUTs were just glorified curves, and 3D LUTs not so complex color transformations. It’s all bits and bytes, matrix here, matrix there, I have already seen it all. Booooring.
But this was before I was asked to review 3D LUT Creator.
What Is It?
3D LUT Creator is a stand-alone application that allows you to twist, bend and modify color in every way you could possibly imagine. It was created by a Russian photographer/developer Oleg Sharonov at first for his own use, and then released publicly. It is available in 3 versions (Grading edition, Standard, and Pro), that offer different capabilities. I was given a Pro version for testing with all options unlocked.
What Can You Do With It?
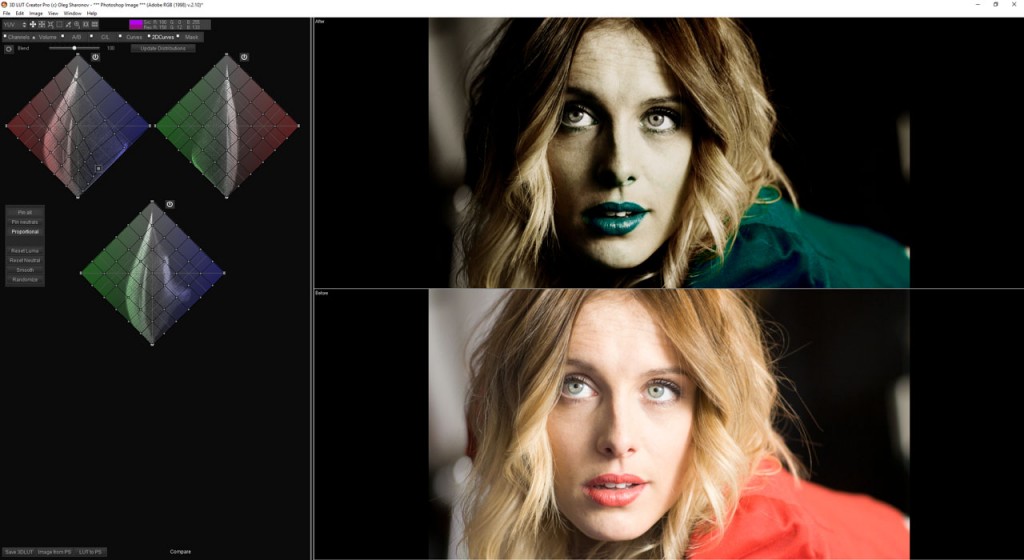
Everything and anything that has to do with color transformation. Seriously, there seem to be no limits. The editor opens with the A/B chart, at the bottom of which you will find the controls such as tint and temperature, brightness, contrast, saturation and most of the usual suspects. Next on the familiarity scale will be the RGB and Lightness curves, and on the same tab you will also find their more advanced counterparts: Luma/Sat, Sat/Luma and Sat/Sat. But this is just a warm-up. The real magic happens in three other tabs: A/B, C/L and 2D Curves.
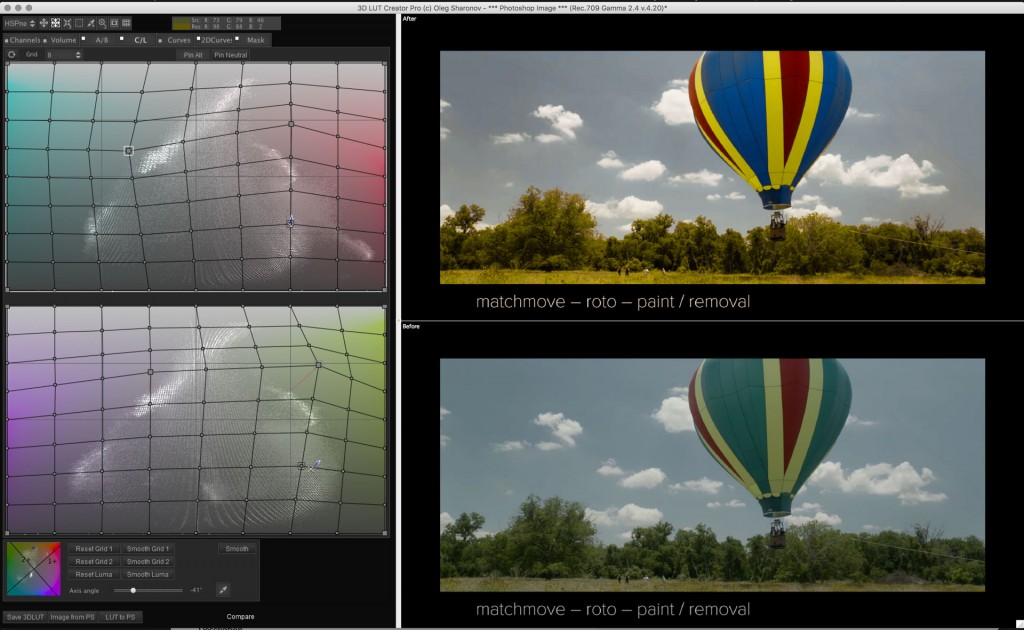
A/B chart is the color wheel or a vectroscope – pure color without the lightness component. On the chart there is a grid, which shape and division can be adjusted using the options right above. Dragging anywhere in the grid will move one or more points to another place, resulting in a smooth change of the associated color. This dragging works a bit like the puppet tool in After Effects – the points which are not pinned (larger) will also be adjusted to create a smoother transition. It takes a moment to get used to the way this dragging works, especially since there are several ways to select them and effect the change. You can also drag directly on a picture, if you so prefer. And if you want to change the lightness of a particular color, just press Shift and drag the points up or down. This grid-based transformation is really the secret sauce of 3D LUT Creator. I have never seen anything else that gives you this amount of control.
C/L stands probably for Chroma/Lightness and contains two charts that intersect the A/B surface perpendicularly and show the lightness on the vertical axis, and saturation of a given color on the horizontal. The middle of the horizontal axis is the neutral grey, and on both ends are the opposite colors, fully saturated: for example magenta/green and blue/yellow. But these pairs are not set, you can change them by manipulating the inconspicuous angle slider on the bottom, which will rotate these surfaces. Again, by dragging on the grids you can adjust the saturation and lightness of certain colors. It’s like Lab curves on steroids with complete control.
2D Curves are RGB color pairs (R-G, G-B and R-B) versus Lightness (vertically). It’s like C/L but on the planes of three primaries instead of the intersection of the color wheel. Again, another grid transformation, but in a different plane. I hope now you begin to understand the power that this program gives you. Whatever mode is best for a particular job, you will find it there. It all reminded me of my prepress days, where I would switch between Lab, RGB and CMYK depending on the effect that I wanted to achieve. 3D LUT Creator gives you all these options without the need for a lossy conversion.
Additionally, you will find three more tabs: Channel, Volume and Mask. The first two deal with color primaries, the third is where you limit your correction, load external LUTs or modify the processing order of some elements.
Channel is a graphical version of a Color Mixer. The three points symbolize RGB primaries, and you can move them around to determine how the original RGB channels are going to be mapped. This gets translated into the 3×3 matrix, and can be used – among other things – to manually switch profiles, if you know the values that you need. This probably won’t get used that often, but sometimes all it takes is sliding this green point towards magenta to change your spring to fall.
Volume has been the most mysterious one for me, because I have not seen it used in the tutorials that I watched, and it is also not perfectly clear what math is happening behind the scenes. It seems to be another version of color mixer, but this time applied more to the proportions of different channels globally or in light/dark areas. It can be used for split toning. One way or another, displaying it in such a graphical way, instead of a series of three sliders, feels much more intuitive and is much faster to adjust.
Finally, the mask tab is where you can limit your correction. In a typical 3D LUT Creator manner it gives you a lot of choices, such as which channel you want to base your mask on, where in the process you want to apply it, and how you want to modify it. The OS X version I was using had a bug, where the mask curve chart was cut off, but I received a confirmation that it is going to be resolved in the near future. When it comes to masks, be sure to watch this tutorial to see what amazing things you can do:
Apart from adding a mask, you can also import an external LUT and apply it at various points in the calculations. Browsing different LUTs is also pretty easy, as the program will recognize other LUTs in the folder and clicking on previous and next button will load another one. 3D LUT Creator allows you also to compile the current correction as a LUT and load it, thereby freeing you to make another correction on top of the previous one – though this correction is going to be lost, unless you save it. On one hand, it is useful, on the other it feels like a workaround to a larger issue, which I will come back to later.
The Mask tab also contains the Master module, which also can limit the application of your correction to the source image. Using various blending modes, selecting which part of the correction is to be applied in what capacity (from -200% to +200%) and using which color model, you can fine-tune the final result to your heart’s content.
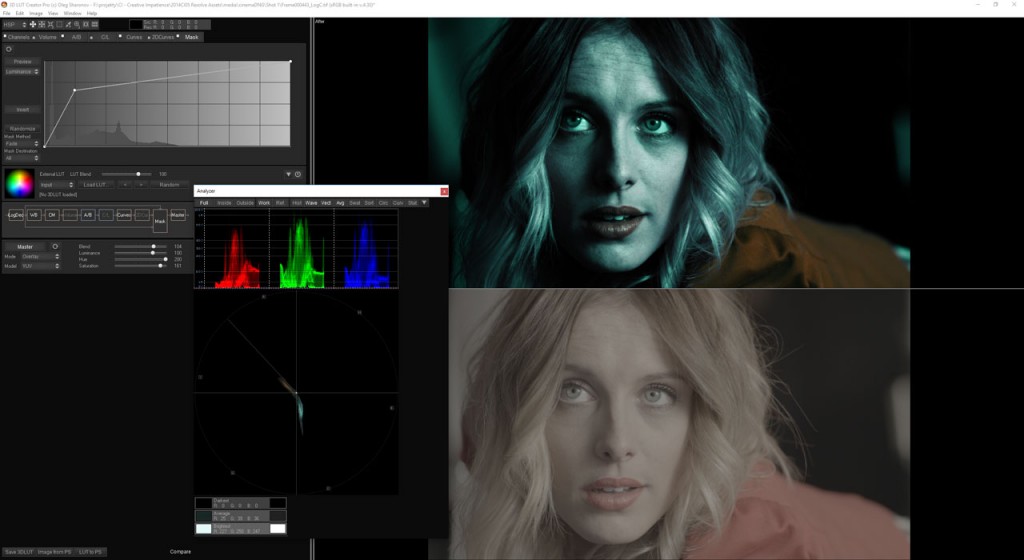
With Mask you can change the way your transformation is applied to the source image. Crazy powerful.
Each tab can be turned on and off to assess its effect, and there are many ways to compare before and after images, store multiple versions of your corrections, as well as a plethora of options to match colors to a reference image, including various professional color targets. For even more technically inclined, opening an Analyzer window will show scopes, image statistics, metadata and other useful items. To help you overcome a creative block there is the Look Manager, which contains a ton of presets, and on top of that both curves tabs have the Randomize button, which can also produce interesting results.
If you are not yet terribly impressed and overwhelmed, let me add to this the tiny dropdown in the upper left corner which allows you to choose a model for your calculations, including Lab, YUV, CMYK, RGBW and a number of other choices, such as various types of HSP, a cousin of HSB or HSV. Those who wish for even more options, can delve into preferences or explore various color profiles that are accessible from the Image menu. I have not ventured that far.
This brief overview does not exhaust the amazing capabilities of 3D LUT Creator’s toolset. There are only two major limitations to it. First, you are working with overall color transformation, meaning that no localized changes are possible. No vignettes, masks or pixel manipulation. And second, all these corrections can only be applied once (well, mostly) and in a particular fixed order, that you can examine on the Mask tab. But other than that? Pure color magic.
Optimized For Still Image Processing
I first heard about LUTs when I started learning about color grading for film and video. This term did not appear on my radar when I was doing still image corrections and prepress. Back then we just had various adjustment layers. And yet, 3D LUT Creator is especially optimized to manipulating stills. You can load jpegs, tiffs, pngs, exrs, and a various assortment of raw files, as well as formats that nobody has ever heard of, but no video files. No moving picture at all.
On a similar note, the application does perform autosaves, but it saves just the modified tiff file next to the original, not the correction itself. The major save menu option and its shortcut (Cmd+S) also performs image save. If you forget to save the correction as a preset file, it will be gone. Plus the only available save formats are jpg, tiff and png, and it is the integration with Photoshop that takes the prominent place both on screen and in the preferences. Clearly the still image, and not the correction, is the hero of this story. Actual presets and LUTs seem almost like an afterthought.
It felt – and still feels – strange to me, especially since arriving at an interesting result usually involves a bit of work, and my natural instinct is to preserve this transformation in case I want to replicate it. Similarly, when you open another image file, the applied correction does not disappear, you have to reset it separately. This is certainly useful in some cases, and perhaps less useful in others. It definitely feels different from any other application that I have ever used.
I do not know, if this is just my reaction to the application forcing its own particular workflow on me, or me just being stubborn and conservative, but all this made me feel like I’m using a tool that belongs to somebody else. 3D LUT Creator seems to be saying: hey, I’ve got all these great things for you, but you must do everything my way. It might not matter in the long run, but it definitely makes the learning curve steeper.
How About Video?
LUTs are used in film and video industry daily in numerous ways. Some cameras save LUTs that allow a quick preview of log-encoded footage on a monitor on set that can load a LUT to modify the input signal or through a box that has the same capability. DPs create LUTs when they want to show how the processed image is going to look like or at the conceptual stage. Some time ago LUTs were used as the process of Digital Intermediate to simulate the look of the correction after its transfer back to a given film stock. Finally, they are passed to VFX artists so that during compositing the source image remains unchanged, and all the compositing happens “below” the LUT.
Their usage grew, especially with the recent democratization of color grading tools. When you were able to save a LUT from software such as SpeedGrade or Resolve, and then apply them in an NLE or in After Effects, suddenly a plethora of products appeared that promised amazing results with the use of these magic files. A lot of this was preying on the lack of knowledge about what LUTs are and are not, and on lower standards that editors usually have about color. Considering LUTs’ limitations, in my opinion these products always fell short of anything that you could achieve with any proper grading tool, because they had been designed for a specific shot, for a specific purpose, and would still require some tweaking on source material with different characteristic than the one a LUT was intended for. Of course, creative people can do amazing things with mundane components, so I freely admit that there has been some incredibly creative applications of these LUT-based products. Even Photoshop included an adjustment layer that could load a 1D or 3D LUT file and apply it to the image – the capability of which 3D LUT Creator is taking extensive advantage. Fortunately the LUT craze has calmed down a bit, LUTs are falling back into their usual places, and having an assortment of LUTs no longer makes you a colorist by default.
How does 3D LUT Creator fit into this? Everything that I wrote before about color manipulation can be applied to a motion picture. The program itself allows only preview of stills, and you cannot see the effect until you apply the LUT in your application of choice. Moving pictures are by definition dynamic, and sometimes a courageous grade can still result in an unexpected bit of color popping up in an unexpected place, requiring an adjustment that is localized not only in space, but also in time. This is where a secondary color correction would be applied – either limiting the LUT effect or adding another one on top. This is something, that 3D LUT Creator will not do for you. You have to use other tools that can manage this spatially-temporal issues.
Of course, 3D LUT Creator is able to provide LUTs for both the usual and rare applications. It is not the easiest nor the fastest tool to use for your everyday corrections though, and as a colorist I would reach for it only when my usual toolset did not provide required options. The color separation achieved in 3D LUT Creator can be extremely gentle, and it’s very hard to create a transformation that will have visible noise or banding. So if you are having problems with your secondaries in Resolve, chances are that this application can help you. It depends on you deadlines and if you can fit this software into your general workflow, but it helps to have it as something that can save you when everything else fails.
Does It Play Well With Others?
We already know that as a stand-alone color correcting tool it is doing a great job. How about interaction with other pieces of software?
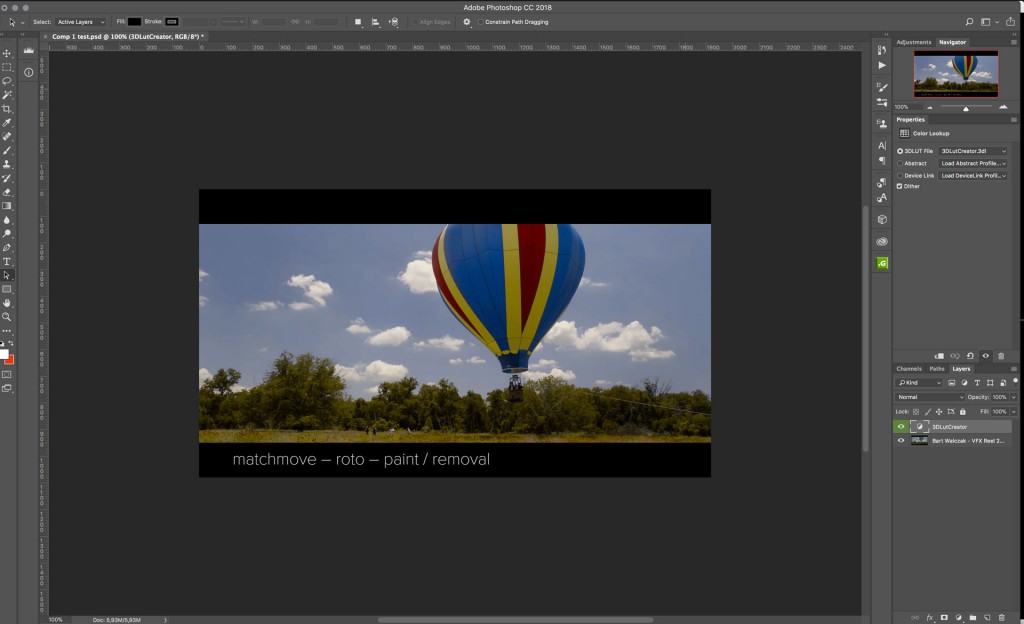
Loading an image from Photoshop is as simple as clicking the “Image from PS” button. Sending the results back is the adjacent one – “LUT to PS” – which will either apply the LUT adjustment layer to the open picture or open the picture and then apply the correction. Swift, simple, works like a charm with one exception that I will mention in a moment.
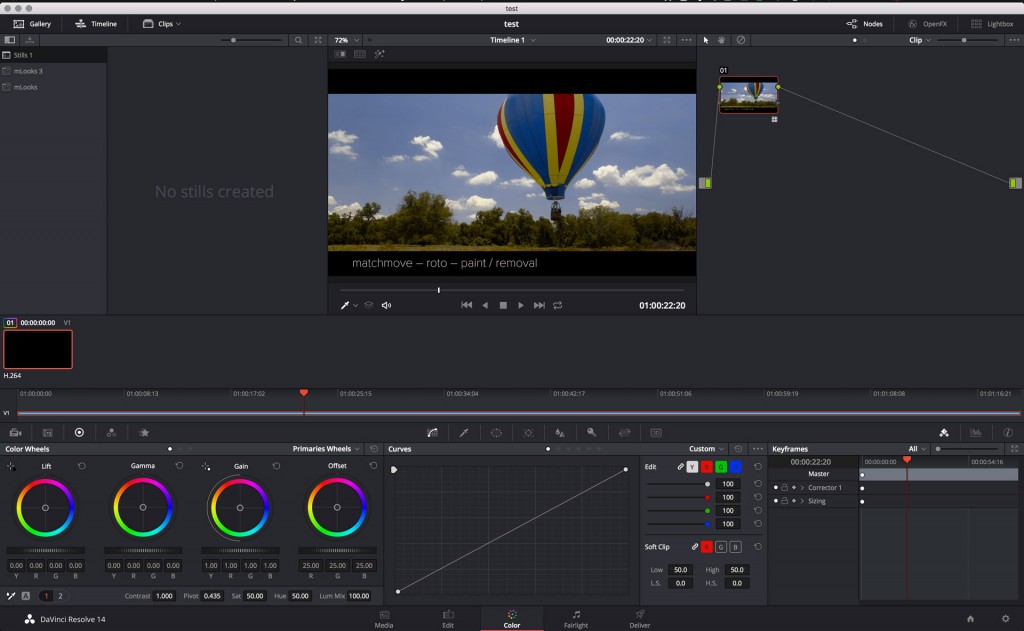
For interaction with other programs, just export a 3D LUT in one of the formats that your application will import. I tried it with After Effects, Resolve, and Premiere with no hiccups. Some workflows are easier, than others – Resolve is particularly unwieldy, as it requires you to refresh the list of available LUTs – but in general there is nothing surprising as long as you stay within the video space, be it Rec709 or sRGB. On the other hand, when you move to the log-encoded land, the things may quickly go awry.
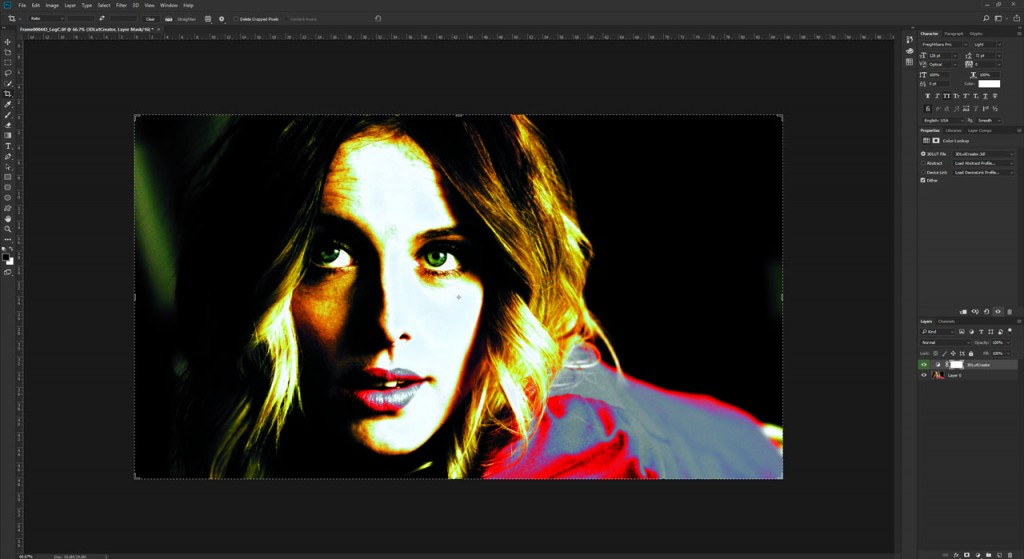
Opening log-encoded CinemaDNG file and sending it to Photoshop did not produce expected results. Better stick to sending images from Photoshop to 3D LUT Creator.
Log workflow in 3D LUT Creator is convoluted, and I was able to unintentionally break it multiple times. DPX files are not supported at all. ARRI footage that I tried definitely had issues that I could not reconcile and no amount of twiddling with controls made the results usable. Even though the r3d format is shown in the file list in Open File dialog, I was unable to open any of RED files successfully. Cinema DNG from BMD worked better, but when I tried to move the created LUT to Photoshop, the results were less than stellar – apparently the default CameraRAW decoding is different than the one used by 3D LUT Creator, and the applied correction looked totally out of place. Similarly, applying these LUTs in Resolve yielded a different effect. It was usable, still interesting, but different than intended. I had to resort to opening a raw image in Photoshop, and then sending it to 3D LUT Creator. Perhaps there are options that I am missing, or I am trying to do something that the application is not yet suited to do, but it feels like the raw part has not been fully developed or tested. Even the video tutorials suggest exporting a tiff still image and working from there. One way or another, the film-like log experience has been pretty much a miss for me.
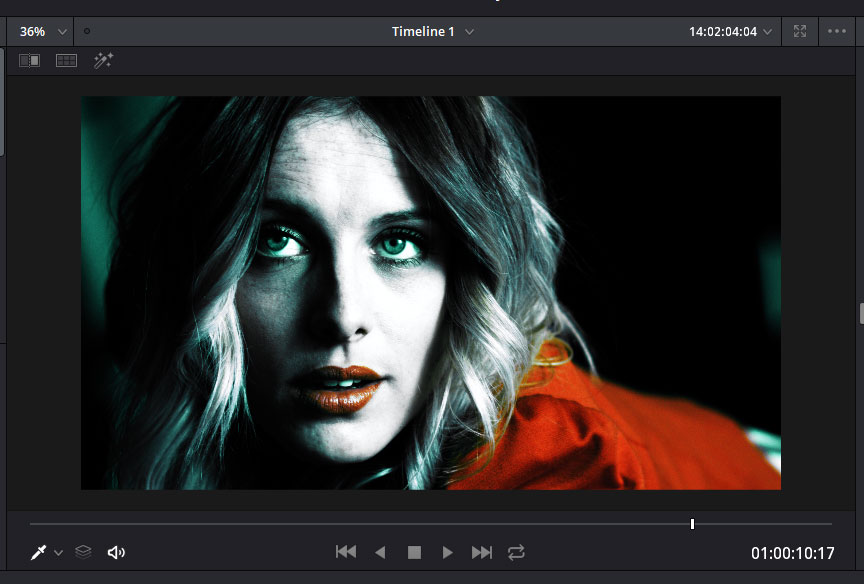
Sending a log-based Cinema DNG LUT to Resolve gave an interesting effect, but was different than intended. Log workflow is very finicky.
A Few Shortcomings
After spending several days in 3D LUT Creator I still have to come to grips with its UI. It feels like it has been developed by a lonely genius engineer and fine-tuned to his own workflow. When it comes to color adjustment it is functional, extremely creative, even revolutionary. But it’s also a bit intimidating, disorganized and too different from everything else even in the places where it could have been made more familiar. Features are not easy to discover and the program would benefit greatly from somebody with UI/UX experience to make it more user-friendly and more appealing to less savvy users. The learning curve is steep. Do not even attempt to use it without watching the tutorials on the website. Also, while Windows version is snappy and responsive, Mac experience leaves a bit to be desired. The OS X version feels pretty sluggish and some shortcuts are not very Mac-like with the use the Control key.
As a stand-alone application with a fixed workflow it is sometimes unwieldy, despite all the amazing ways that you can do. While playing with it, I constantly envisioned adding localized corrections to fix certain parts of an image or wanting to stack several corrections and see how well they all play together. Unfortunately, currently it is either not possible or extremely time-consuming with numerous round-tripping between several applications. It would be amazing if it were a plugin or a set of plugins for After Effects, Resolve, Photoshop or another host. That would allow for more flexibility and literally open new worlds for me. As it is I am struggling to fit it into my workflow.
Finally, I will dare to say that the name itself might be detrimental to the program’s reception and success. It sounds extremely technical and immediately breeds questions such as: what is a LUT? Why is it 3D? And why should I create one? Is it of any interest to me? Aren’t LUTs created by more technically apt people? I am a simple creative, I wouldn’t know a LUT if it jumped on me, is this tool for me at all? It is kind of telling that I heard about this app when it was first released, but I thought that it was riding on the wave of the LUT pseudo-grading craze and dismissed it. I downloaded a trial, played with it for several minutes, and forgot about it an hour later. It took a direct invitation and a conscious attempt at a more in-depth review before I understood what the program is about and began appreciating the power hidden behind the not-so-interesting interface. I also firmly believe that it can be much more than just a program to create LUTs. The name unnecessarily constricts the amazing potential of this toolset. To achieve great results, knowledge of what a LUT is seems to be absolutely unnecessary.
Summary
My brief ride with 3D LUT Creator has been an experience that left me with ambiguous feelings. This application is like a space shuttle – it’s revolutionary, it changes the way you think and what you consider possible, it can take you to the places you wouldn’t reach any other way, but only when you are able to get over its peculiarities, technical appearance and not so friendly user interface. I have my doubts about its accessibility to users who are less technically inclined and with limited understanding of color science.
3D LUT Creator is extremely powerful at what it does, and if you want to manipulate color in any way, shape or form, it’s unlikely that you will find anything comparable on the market. It makes you think differently about color correction and teaches you a lot when you are using it. But it’s also quite constricted within its own workflow, and if yours is different, you have to work around it, which always takes the joy away.
I have great amount of respect for all the work that Oleg Sharonov has put into this program, despite the shortcomings that I listed above. To me he truly is a successor of Dan Margulis. I can only imagine what would be possible if he had access to a team of developers, UX designers and marketing team from, say, Blackmagic Design, that would help him to unlock its full potential, integrate it with other solutions, and make it appeal to a wider audience. Imagine these corrections available as plugins in your own favorite software, with a clean, eye-pleasing UI, available at a click of a button.
At this point, will I be using 3D LUT Creator myself? I would love to, though there are hurdles. Despite all its power, there is still a lot of acrobatics required to make it work within the video workflow, especially when using log footage. However, the access to and speed of making some corrections can sometimes make it worth the time. I am already yearning for the power of this toolset in my other apps of choice.
As for you, dear Readers, you can download a trial version and give it a go. And don’t forget to watch the tutorials first for both instruction and inspiration, they will blow your mind! Happy color bending.





Really great article. Thanks for taking the time to explain things in such great detail in a way that is easy to understand.
VERY THOUGHTFUL review. I’ll keep my eye on this software, HOPE that someone like DxO reaches out to Oleg. (NIK, bought by this forward looking software developer AFTER it was already conceived, pretty damn-well finessed much earlier by Nils Kokemohr and colleagues at the ‘original’ “Nik Software” group.) If only…
I think I can explain why 3D Lut Creator’s (I’ll abbreviate the program to just 3DL) LUTs look different when used with Adobe Camera Raw.
3DL uses libraw to decode raw files, which is an open source library used by many commerical and open source programs. When a LUT is applied in 3DL while working on a raw file, the raw file is converted to a TIFF internally with a particular color space (you can tweak the details of these steps in the settings). However if you apply a LUT in Adobe Camera Raw , the raw file first has the adobe standard camera profile applied. Then the raw file is internally converted to a standard color space (Adobe RGB by default). Then the LUT is applied as a look on top of this.
So, opening a raw file in photoshop with ACR has different processing steps involved than 3DL does. Furthermore, a LUT created in one color space will NOT produce the same colors and tonality if applied in another color space. This is because most LUT formats have their values listed as RGB triplets. What a particular RGB value means in terms of color depends on the working color space. For example, [1,0,0] is not the same in sRGB as it is in ProPhoto because ProPhoto and sRGB have different color primaries. The only way to apply a LUT and achieve the intended look is to ensure that is applied in the right space. The only exception to this is a particular type of ICC profile called abstract profiles which encode the LUT in a LAB cube. I don’t mean an input ICC profile. Input ICC profiles also encode a LUT in LAB (or XYZ) space but the transformation involved is RGB to LAB. Abstract profiles are LAB-to-LAB transformations, so the exact same appearance results regardless of the particular RGB profile of the image. Photoshop can use abstract ICC profiles when loading a LUT. This is somewhat of a tangent but may be useful for those wanting a way to apply LUTs in a consistent way. Still, ACR will result in a different raw conversion so I’d recommend saving a raw file as a TIFF with ACR and then loading the TIFF into 3DL.