SIYAH (Summary If You Are in a Hurry): If you want your clip to fade to black, apply simple cross-fade at its end. Use dip to black only as a transition between two clips, not at the beginning or at the end of a clip.
There seems to be some misunderstanding about how and when to apply transitions like Dip to Black or Dip to White in Premiere Pro. It is even propagated in some training videos and this is pretty unfortunate. I hope this article makes the issue clearer.
First, let’s take a look at how transitions work in Premiere in general.
You can apply any transition as a transition between two clips (“Normal transition”). By default it will be centered on the edit point, although you can easily change it either in the timeline, or in the effect control panel. The transition will then be applied between the two clips – applying the cross-fade, slide, wipe, swush and any other wild effect that you choose to use.
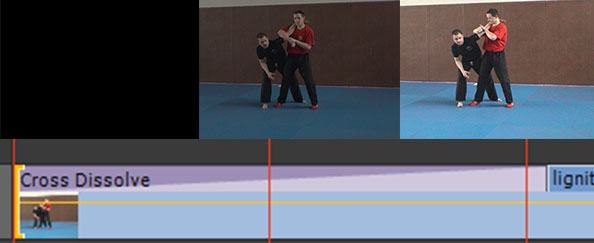
You can also apply a transition at the beginning, or at the end of a given clip (“Single transition”). In that case, Premiere will act as if it was applied between your clip, and a transparent video clip, revealing (but not proplerly transitioning to) the layers beneath, and if there are no layers, the black background.

Cross-fade transition applied at the beginning of a single clip. It is the proper way to fade the clip from or to black.
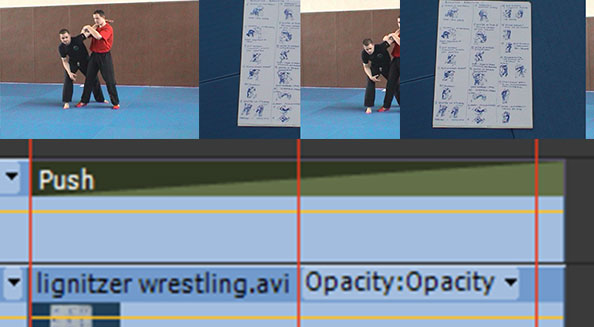
Push is a good example of the difference between transition and reveal. If you apply it between two clips, you will see both pictures moving. However, if you only apply it to a clip on a layer above, only the clip with the transition will move, revealing a static clip beneath. There are times that you might want to use one way or the other, depending on your artistic preference. No way is necessarily more proper than another, just be aware of the difference.

Push transition applied at the end of a clip reveals the underlying static layer. Only the clip with the transition is moving.
Now let’s take a look at how Dip to Black or Dip to White transitions work.
Each is an equivalent to creating a single frame of black or white, and cross-fading first the outgoing clip into the given color, and then fading in the incoming clip from this color.

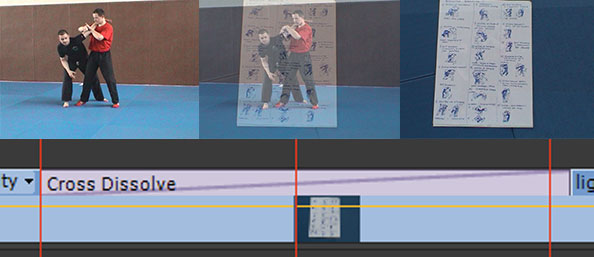
Dip to Black as a transition fades the outgoing clip to black, and then reveals the incoming clip by fading from black.
It means, that if you apply it at the beginning, or at the end of the clip you will see the clip fading to the color in the middle of the transition, not at the end of it. I’ve seen people compensating for it by tweaking the transition end point in the effect panel, which seems to me the worst possible way to do it. Let me repeat: you should never use Dip to Black or Dip to White at the beginning or at the end of a single clip. Use it only as a transition between two clips.

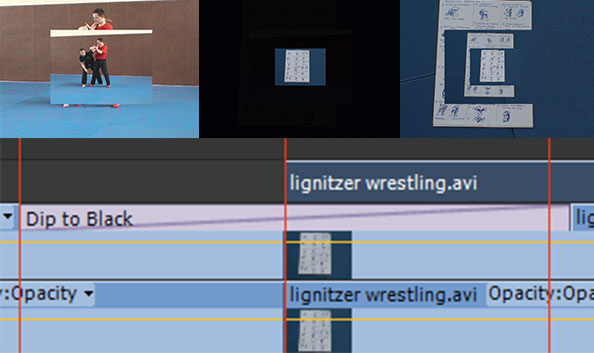
Dip to Black applied to the beginning of the clip will produce the first half of the transition as black frames. You should never do that. Ever.
Dip to black might also produce some weird results with multiple layers or transitions stacked upon each other. It used to be worse in previous versions (the example shown in the video mentioned at the beginning would fade the whole sequence to black upon encountering the video due to a bug in render order in CS3), but still dip to black will fade all layers below itself to black, not only the clip that you apply the transition to. It might surprise you, especially if you don’t know how exactly the effect works.

Dip to Black applied to a given layer will fade to black not only this layer, but also all the layers beneath, and in earlier versions of Premiere also the layer above. Unless you know what you are doing, stay away from this method of applying this effect.
I hope this clears the issue.
Tips
Additionally I’d like to offer a few productivity tips regarding the transitions in Premiere Pro CS6:
- Keyboard shortcut for “Apply Video Transition” is set by default to ctrl/cmd+D. Set your default transition to Film Dissolve or Dip to Black, and redefine as ctrl+alt/cmd+opt + D.
- Define a keyboard shortcut for “Apply Video Crossfade Transition” as ctrl/cmd+D.
- You can also customize “Apply Video Dip To White Transition” and “Apply Video Wipe Transition” in a similar manner, if you so choose.
- To apply a transition at the beginning or at the end of the clip that is adjacent to another clip, hold ctrl/cmd while dragging the transition from the bin – unfortunately, no keyboard equivalent exists yet. This tip also applies to earlier versions of Premiere.


Bart,
I understand your point on transitions, particularly Dips and Fades. However, I don’t agree with you on using a cross dissolve as a single-side transition to achieve a fade in or fade out.
Strictly speaking, a Fade To/From Black is exactly that: a fade TO or FROM black. If you use a cross dissolve on a base video layer to fade in or out to black, you’re actually dissolving to or from transparency. A Premiere Pro sequence is 100% alpha when the frame dimensions are not completely filled with 100% opaque clips; you can see this by changing the Display Mode to Alpha and placing a clip that has smaller dimensions than the sequence into the sequence.
While in most cases you can achieve the result you want–a fade to or from black–using a cross dissolve as you’ve outlined, this can cause problems when you export to a format/codec that supports alpha/transparency. As described above, you can probably see why this would be the case. Most of the time, it’s not an issue, but I’ve seen it before…
What I advocate is using a Black Video synthetic clip to create a fade in or fade out. Simply create the synthetic, add a short piece at the beginning or end of your sequence, and apply a single-sided cross dissolve at the appropriate place on the black video. Since it’s usually common practice to have a black leader at the beginning or tail at the end of a sequence, you can accomplish this easily with one clip.
And technically, you CAN create a fade to/from black using Dip to Black. All you have to do is set the Start point to 50 for a fade in, and the End point to 50 for a fade out. This is done in the ECP. I certainly don’t do this… but you can 🙂
Thanks for your input.
Funny you should raise the alpha issue. I was considering mentioning that in the article, since I’m obviously familiar with the way cross-fade works, but then I thought to myself that if you ARE fading from black or to black, you are operating on the whole picture, and would most likely not want to export to a codec with alpha, and considered to be a little bit over the top. Perhaps it was a wrong assumption, and I should have covered that as well.
Of course I agree that the “most proper” way to do it would be to use black video either above, or even easier – as a base layer underneath all clips. And I agree that you can adjust Dip to Black end or start point, which would be the equivalent, even more “kosher” than cross-fade from alpha. But this is not how I’ve seen people work – they just apply Dip to Black, and then wonder why it doesn’t work as it should.
That said, perhaps a preference setting or a sequence setting that would make the base layer opaque color, would make a good feature request.
Yes, absolutely agree. Again, I think it’s pretty rare that anyone would stumble into these issues–and the only reason I point it out is because it’s actually happened to me! I was exporting to a QuickTime file (can’t recall the codec right now) and had alpha enabled without even thinking about it. Lo and behold, the exported file faded in from GRAY, which was how the player app interpreted the alpha at the beginning and end of the sequence. From then on, it was Black Video and cross dissolves for me 😉 If you’re going to a codec that doesn’t support alpha–let’s say an H.264 MP4–it’s not really a concern that I’m aware of, but old habits die hard now.
Black video below all tracks (Video 1) is a good option, too, particularly if you’re going to and coming back from black frequently within a sequence. It’s easier than Dip to Black, since you can easily adjust the interval between your clips–something that doesn’t really work with Dip to Black.
Anyway, great conversation and I appreciate you bringing up this topic.
LOL about the fade from gray – I totally understand where you’re coming from 🙂
There’s nothing like a good conversation with passionate people who also know their tools and craft well 🙂
This may be a dumb question, but I’m curious: On the scale of right vs. wrong when it comes to transitions, where does keyframe animation (opacity, particularly) weigh in?
It’s not wrong. It’s inefficient in most cases though, unless you really have to use it – for example by fading to black solid where you have multiple layers composited on top of each other, and there’s simply no other way to do it. The problem with keyframe animation is that it is notoriously difficult to adjust if you have to make edits.
If I have two sequences can I apply a transition across the end of one sequence and the beginning of second sequence/
Sequences are treated like media clips when it comes to applying transitions. Which means that to make a crossfade between the two sequences you have to make sure that you give them handles on the beginning and on the end. Otherwise it’s like applying the transition without enough media.
Hi, thanks for the great article but I still couldn’t find an answer to my question/problem: I find the ‘manual’ opacity fade in/out transitions to appear much more smother and pleasant to the eye than the cross dissolve/dip to black ones, even if I create them with the exact same times i.e. 1 second cross dissolve at the end of a clip is different(worst imo) than a manually 1 second opacity fade out. Hope this makes sense. Is there any way to replicate the smoothness of manual opacity fades? Thanks in advance for any replies
Try turning off “Composite in linear color” in Sequence Settings dialog box.
omg…this just solved all of my despair in one go. THANKS BARTMAN!!
You’re welcome 🙂
Thanks for your prompt reply but for some reason I don’t seem to have that option available in my sequence settings. I’ve got a decent card (gtx 680) but I might have changed some settings in the past in an attempt to make the most out of my gpu. That might have caused that option to disappear? not sure, anyway, I’m quite an amateur with Premier so any help would be appreciated. Thanks!
This option appeared in CC version, perhaps you’re still using CS6. In that case you might try working in the software mode or putting a transparent video before the clip and making it a transition between the two. The problem is only exhibited when the transition is single-sided.
Hey, thanks for your help with this and apologies I didn’t reply earlier. You’re right, I’m using CS6, I didn’t bother changing it for this project as it was quite big and I got lazy but I will try your advice soon on my next project. Thanks for everything mate, really appreciate it.
Thanks for the post. I’m having trouble easing out a push transition. I understand how to ease out with keyframes, but in the effect controls for the ‘push’ I don’t see any way to ease in or ease out. Can you point me in the right direction?
Currently there is no way to modify the transition progress, it is always linear – no ease in/out possible. You might want to look to other developers like Film Impact or New Blue and see if they offer this in their transitions as an effect control.
Pingback: Animation | Jordan.B's College blog