The very first thing that you should do… no, let me try again. The very first thing that you must do after installing and opening the new Premiere Pro CC is to set a keyboard shortcut for Deselect All. Trust me. This will save you a lot of trouble later.
This is something that you must do as well, if you think that applying transitions in Premiere no longer works.
Open the Edit menu, choose Keyboard Shortcuts…, and in the search box type “deselect”. Fortunately only one option will be visible, the one that appears in the Edit group – “Deselect All”. Assign a shortcut to it which will be easy for you to remember. I sincerely recommend

Set this shortcut right now!
Why?
Premiere Pro CC introduces what is called “the primacy of selection”. Translated to plain English it means, that if you have anything selected in the timeline, Premiere will attempt to use the selection for any operation you choose, disregarding track selections, playhead position, etc. While there is an argument to be made that it’s more effective, more consistent (well, perhaps some day), it is changing the behavior which was long established in Premiere – using the playhead position for applying transitions.
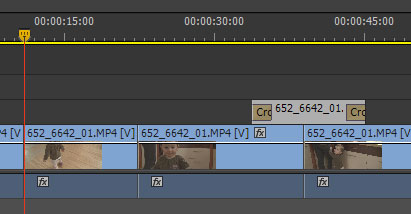
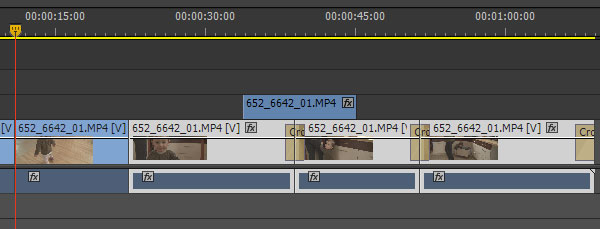
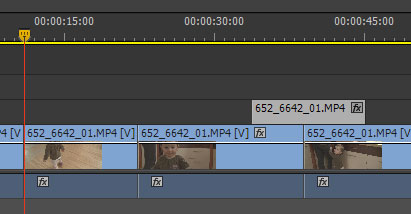
Here’s how the new behavior works: if a clip is selected, and it is between two other clips, nothing happens. If the clip has at least one edit point where it does not touch anything, then the selected transition is applied to the loose ends. And if multiple clips are selected, the transitions are additionally applied between these clips. Not very obvious, right?

And here’s the result – instead of applying the transition to the edit point under the playhead, the selected clip receives the transitions on both sides.
If you are like me, and you select and deselect clips all the time, whether to adjust effects or for any other reason, then this new behavior is going to bite your muscle memory hard. Before you learn the
This is the collateral damage or “the primacy of selection”. If you forgot to deselect, and want to use the old way of applying transitions – by the track selection and playhead position – then you are screwed, and need to adjust. It does not help to know that this behavior is the result of Final Cut Pro’s inability to select multiple edit points at once, and was introduced there as a remedy to this limitation. Supposedly a lot of FCP users asked for this functionality in Premiere. They got it, and it came at a cost to established workflows. Like the introduction of patch panels in CS4, only more mischievous, because the results may not be immediately visible.

The transitions are applied at the end, and in between the clips. Remember to learn the new combination of keys – D, cmd/ctrl+D – if you want to use the playhead to apply the transitions.
To add confusion, there is a keyboard shortcut to “Apply Default Transition to Selection”, which works exactly like Apply Default Transition if clips are selected, although it applies both audio, and video transitions.
My little mind can’t comprehend the idea behind this change, especially since I’m not the only one who was taken aback upon the first encounter with the new behavior. But I know of others who are happy about it, and I found some use of it as well… only to encounter a stray transition during the final viewing of a recent production.
So remember –


Pretty frustrating, I agree! A method I’ve found is setting an unused key (in my case it’s “D”) to “Select Nearest Edit Point as Roll”, which selects the edit point your playhead is over, and then applying the default transition. This helps keep it focused on where the playhead is, so the only extra step now is pressing D to select. It also additive so you could select multiple edit points to apply the transition to, though this could be frustrating if you have a bunch of stuff selected. In that case, I use “E” to Deselect All.
Very nice suggestion as well!
Thank you
Hi Bart!
Here’s the solution I suggested on Adobe’s PP forum (http://forums.adobe.com/message/5540853#5540853, last post):
To give users the best of both worlds, the new CC convenience of applying several transitions at once when so desired + the CS6 confidence that transitions will only be applied where and when desired, I would do the following tweaks:
1. 1 or more clips selected and CTI over selection = current CC behaviour: default transition set to every selected clip’s in/out points
2. 1 or more clips selected and CTI outside of selection = CS6 behaviour: only apply default transitions to any clip in/out point(s) directly under the CTI
What do you think?
Cheers!
Hi again. Actually, I have a better solution to request from Adobe than the one I provided above:
1. Restore CS6 Ctrl-D, Ctrl-Shift-D shortcuts
2. Provide NEW shortcuts for users who want to apply default transitions to selected clips rather than to clips under the CTI.
This way, users would have the power of CHOICE. They could set their shortcuts to work like they did in CS6, period. Or they could choose a balance of CS6 and CC functionality, with different shortcuts for each function.
Adding default transitions is something users do so often that we need the choice to decide how it works.
I’ll send an official FR for this. Please add your own and encourage other to do so as well Bart! Thanks
Hi Perre Louis,
I’ve been on the holidays, unable to respond.
The second solution was what I proposed to Adobe, especially since you already have the “Apply Default Transition to Selection” shortcut key, but I don’t see it coming back. I also suggested limiting the functionality to selected trimming points, not to selected clips, which would be more intuitive. Not sure on the status of it either though.
THANK YOU SO MUCH
this is also very usefull before adding Marker to sequence. if a clip selected, then the “add marker” key makes a marker to the selected clip and not to trhe sequence. so as from now the add mark combination will be “D”, “M”.
I agree, though the marker behaviour was introduced only recently, in 7.2
This is a great post, thanks for your time writing it. Sometimes I think Adobe premiere engineers listen to the Nike motto a little too much and Just Do It, never thinking it through. The most frustrating thing is when you slip a video track causing one clip to be selected, then try to add a transition by the Current Time indicator (CTI) and nothing at all happens. It just does nothing.
From a programming standpoint the feature should work “smartly” based on what was done last. If you select a clip(s) last then use the new CC method to add transitions or whatever. If you scrub or click the CTI or time bar as the last thing before ctrl + D, etc. then the software should use the CTI. It’s not extremely difficult to code that smart functionality into an advanced software package.
An interesting idea. Though it also requires you to know about this behavior, and it might be confusing. I’m thinking rather about not adding the transition when the selection is out of visible range.
Though I’ve tried my best to use Ctrl+D (the shortcut) to apply default video transition selecting multiple clips on the timeline than doing once at a time, it’s just not happening anyway. I have to manually apply the transitions & it’s ridiculous. It made me mad. Any Solution will be more than welcome..Thanks
Which version of Premiere are you using?