My post with speculations for what’s coming in the next release of Premiere Pro turned out to be one of the most popular articles I’ve ever written. I’m happy to say that out of the little screenshot I got quite a few things right – and a few things wrong. Some time after writing this blog note, thanks to the courtesy of Adobe I had the chance to pay with the pre-release build of Premiere myself, and now I’m pretty confident to say that it is one of the biggest releases ever, when it comes to functionality, and it certainly does not disappoint.
A lot of energy has been spent on catering to the wishes of people coming from the background of FCP or Avid, with already ingrained muscle memory, to make the Premiere work in a more similar fashion. Thankfully in this release there have been fewer casualties for the long-term users of Premiere like myself, than with transition from CS5.5 to CS6, or from CS3 to CS4.
Let’s go by the new features one by one.
The timeline redesign and UI improvements
The most obvious one is another revamping of the UI, this time mostly in the timeline panel. The first impression is quite positive – the new Premiere is very snappy, it breathed a new life into my old machine which was totally unexpected, but very welcome.

The timeline has been totally revamped, and will require some time to get used to, but once you do, you’ll never look back.
The second look is perhaps a bit more ambivalent. A lot has changed. Some relearning will be required. And most likely it’s not the end of the road.
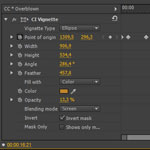
The track headers are now almost totally customizable, to the extent that one can leave only track number and lock icon. Audio tracks headers received a few new options to display, including not only Mute/Solo/Record switches, but also the track volume, pan and even track meter. These controls can now be arranged in such a way, that when the track is collapsed, only a few of them are visible, and the rest is revealed gradually upon expanding – which now can be done either by scrolling the mouse wheel after placing the cursor on a track, or with the use of several keyboard shortcuts and presets. Yes, the timeline does have presets for the track heights. Neat, although with some limitations. And no, the track headers do not have presets (yet?).
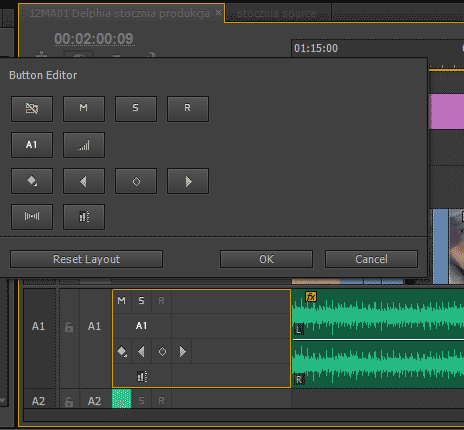
Audio headers can be customized to your heart’s content, adding track meters, track volume or pan.
There are also options to turn on and off the names of the clips, clip markers, through edits, (which can also be joined by simply deleting the edit point) or even waveforms. Interestingly, the waveforms also have received another display option – “rectified” – available through the timeline panel menu. After turning it on, only the upper part of the waveform is displayed, making it possible to see more of the signal within the smaller window. However, personally I found it to be much less useful than expanding an audio track. For some reason rectified waveforms are not as easy to read, as the standard ones.
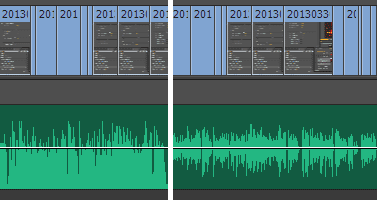
Rectified audio waveform on the left, and classic audio waveform on the right. I still think that the classic one is easier to read.
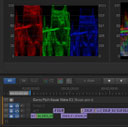
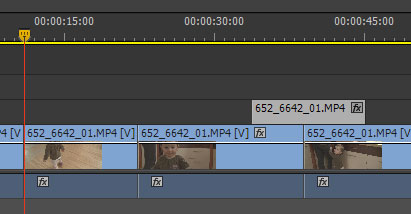
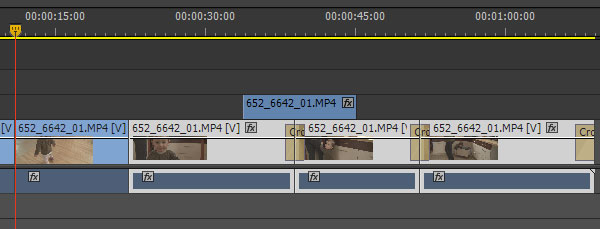
When it comes to clip effects, the old text selection of currently shown effect was changed into a small icon showing simple “fx” inside a small rectangle. Its color depends on what type of effects have been applied to the clip – built-in motion and opacity show up as yellow, other effects as purple, both as green, and no effects as gray. Unfortunately the icon does not show applied speed changes, either time remapped, or with standard dialog, and it is always visible, which sometimes might be a bit annoying, because on the dense timelines it can add to the unnecessary click hijacking.
A few other notable changes include the size of transition handles – they now occupy about 80% of the clip’s height. It certainly makes it easier to adjust them, although finding an edit point with a mouse has become a bit harder. It is also possible to display indicators showing the duplicate clips in the timeline.
Also, the timeline UI colors have changed. The track selection is subtle, perhaps even too subtle for my taste. Clip selection is fine, but in/out is on the verge of readability. It might cause problems for some people with poorer eyesight.
All in all, it’s great to be able to adjust the options and leave a lot of clutter (like poorly working Track Sync-Locks) behind. Some features are still begging to be added, a few places seem not as polished as they could have been, and it’s sometimes easy to get lost in the plethora of new options, but the timeline is generally more responsive, easier to customize and manipulate, and there’s no denying to the large improvements in the usability, once the initial shock and adjustment period have passed.
General editing enhancements

The new timeline panel icons. KEM roll (sequence editing) on the left, and the customization wrench on the right.
The very first feature that made me literally shout “yes!” when I saw it was the possibility to edit to the timeline the clips from the sequence loaded to source monitor, instead of parts of nested sequence. Of course, Avid had this functionality for years, so it’s not a revolution in the world of NLEs by any stretch of imagination, it’s just a great addition to Premiere’s toolbox, and a feature that I know I will personally use and love. This feature can be turned on and off with the leftmost icon in the timeline panel.
The second long-requested feature is the possibility to copy the in/out selection to the clipboard. When working in the pancake timeline mode, it is indispensable, even though not being the single key solution of insert/overwrite, it is very close to this goal.
It is now possible to select clips from keyboard, either within the in/out, or under the playhead. It certainly helps with the keyboard-driven workflow. There are still some improvements that could be made in this regard, but it’s certainly the first step in the proper direction. Selected clips can be moved up and down the layer – although the implementation is a bit awkward for linked clips as of now, because you have to unlink or separately select video.
The much touted feature of simplified source targetting is indeed very useful. You no longer have to make sure that both the source and target tracks are selected to put the clip properly on the timeline. Sources are independent of targets, although the targets can be setup in such a way that they follow the sources during editing. It saves a lot of time, and makes one press ctrl+Z a few times less during the editing.
One of the main changes, that will most likely throw many experienced Premiere editors off, at least in the beginning, is the fact that the primacy of selection has also been moved into the application of the transitions. If a clip or a number of clips is selected, then pressing ctrl+D (Apply Default Transition) or any other shortcut that applies a transition, will apply these transitions inbetween the selected clips. Playhead position does no longer count. It can be both a boon and a curse, and will most likely require period of potentially painful readjustment, especially since the mistakes are not that obvious if selection is left outside of the visible part of the timeline.
Some minor but important new features include the ability to increase and decrease the zoom of the source and program monitors with the keyboard, possibility to trim a clip to 0 frames, paste selective attributes, and a few other useful improvements. In general, editing is quicker and even more pleasant with the next version of Premiere.
Multicam
Mutlicam has also been improved in this edition, and even though still a bit convoluted, it’s a tad easier to work with. The most important feature in this area is the possibility to flatten the multiclip, which will overwrite it with the appropriate source clips. Finally XML and EDL exports to other applications will not require as much of the time-consuming conforming. And there’s a nice trick for which you can use the multicam option as well, which I hope to show you soon.
Supposedly there is an option to synchronize the newly created multiclips by audio waveforms – something that Plural Eyes was often used for – but I have not tested it, not having proper material. Perhaps next time.
Media relinking has been totally rewritten, it now is much more intelligent, can use Premiere’s own media browser to locate the missing footage, there is plethora of options, including ignoring the file extension, pretty useful for round tripping with other applications like Resolve. The only downside that I found is that media browser is pretty slow, and it takes a moment to display the list of files in the folder, even in the list view. But other than that, Premiere is clever enough to find the media in a renamed folder by itself, without bothering you. Way to go.
Audio
There are also quite a lot of improvements on the audio front.
First and foremost, the VST plugin architecture has been totally rewritten, and we can finally import most VST2 and VST3 plugins without any problem. The only downside is that you need 64-bit version, so some of the old ones you might have used for Audition will have to be upgraded. That said, a lot of new and improved effects have been added to Premiere Pro, including several ones from Izotope. The viability to export the final mix from Premiere has never been so great.
Apart from audio track mixer, which I personally love and adore, we also received the audio clip mixer, which works the way that Avid and FCP do – it allows to change the volume of a single clip via the mixer itself. It’s a separate panel, although it looks quite similar to Track Mixer at the first sight, and the beginning users might have problems distinguishing the two. Those more experienced will certainly applaud the power given them by having these two at their disposal.
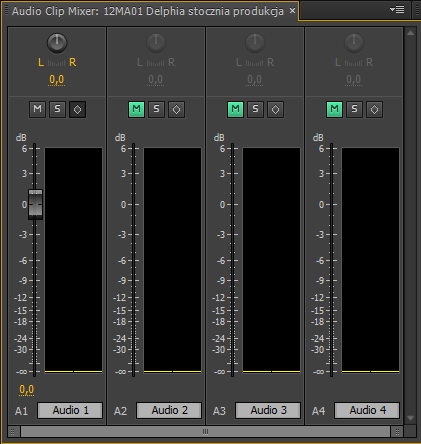
The new audio clip mixer is the answer to the complains from users of other NLE that Audio Track Mixer is useless. There’s no excuse now not to use Premiere Pro.
A few keyboard shortcuts have been added to manipulate the volume and pan of the selected clips in the timeline. Avid users will most likely still miss the possibility to use in/out selection to lower or increase the volume or pan though.
Last but not least – Premiere now supports audio control surfaces to manipulate audio volume. While I have not had an opportunity to work with one myself, I can easily see how this can be of use when doing more complex sound work.
The two things still missing are: the possibility of side-chaining, and the possibility to copy the settings or undo changes made in Audio Track Mixer. I hope these are addressed in one way or another at some point. Because after that, the only thing that remains is to integrate Premiere with Audition 🙂
Lumetri effect and look browser
SpeedGrade integration is not yet on the level which I’d like it to be (see my other note), but a few important steps have been undertaken to make it the reality in the future.
One of them is the ability to import any LUT or look file from SpeedGrade, and apply it to a clip in Premiere. The Lumetri effect does exactly that, and if you open the Lumetri looks branch in the effect panel, and click on any of the subcategories, a look browser will open, allowing you to visually select the one that you are looking for.
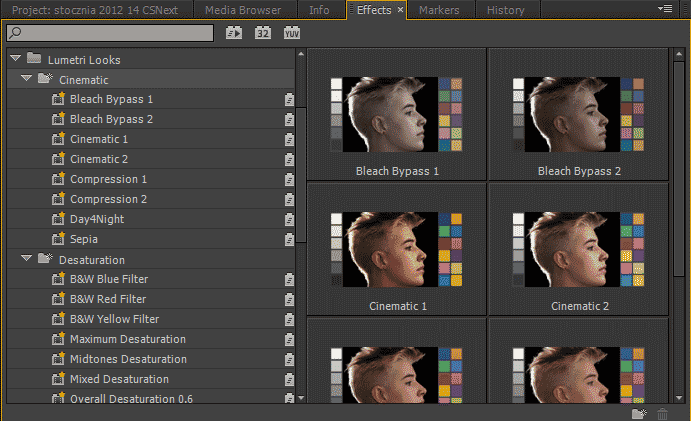
New browser of Lumetri looks is an interesting step towards the greater integration with SpeedGrade, although right now as useful as Magic Bullet Quick Looks.
The effect is GPU accellerated, although don’t expect miracles, especially with the older boards. Granted, in the future perhaps SpeedGrade will be finally able to read Premiere project files, and treat the Lumetri effects as grades to be applied, so the background for the round tripping is already there. Of course, the problematic question of whether SpeedGrade will read the Premiere Pro effects and plugins. But I’ll leave it for Adobe engineers to solve this conundrum.
As of now, however, Lumetri effect is of limited usefulness – akin to Magic Bullet Quick Looks. Good to make the final grade when all the issues of color balance and contrast have already been addressed by more basic tools.
Exchange and new codecs

The added support for DNxHD format in MXF wrapper is one of my most favorite features.
On the front of exchange, a few XML exporting and importing quirks have been fixed, and the possibility to export only selected sequences instead of the whole project has been added. But more importantly, Adobe has embraced the support of DNxHD in its various formats and wrappers, especially with MXF. Not only is this codec supported, but it can also serve as a preview codec in certain sequences, and it features smart rendering – rendered preview files can be used during export, thereby reducing the “Adobe render tax”. Personally I’m going to embrace the DNxHD workflow in my projects, and I don’t intend to ever look back at QuickTime with its problems. And if you ask me – this is about as close as Adobe is going to get to developing its own proprietary codec. Unless something happens in the Avid world and the licensing terms change.
ProRes support has also supposedly received some love from the development team, although personally I didn’t have the chance to test it, and because it’s QuickTime wrapper, I’m not too keen on using it.
Premiere also added the support for Sony’s XAVC, Panasonic’s AVC-Intra 200, and a few other newer codecs, although HEVC has not yet been implemented.
Other changes and features
One other big feature is the enhanced support for closed captioning. I have not tested this feature, and my only regret is that it’s still limited to the broadcast standard files, and it’s not possible to use the common SRT file, or any other file format commonly used in the subtitle world. I believe for some folks the ability to create CC in Premiere is a great addition. If I were using them, I would welcome it as well.
Edit to tape has been totally redesigned, and certainly for those who use it, will be a great addition. Personally I have not had an opportunity to check it out, since all of our workflow is now file-based.
There are numerous small improvements in the general workflow which make the editing easier and more streamlined. Quite a few new keyboard shortcuts added, some removed, numerous bugs fixed (and most likely a few new ones introduced), etc. A few effects have been added, and the crop effect has been modified to include the feathering (it’s still not as cool as my own though, even if GPU accelerated). There have been some cosmetic changes in the menus – the project menu has disappeared, and its contents has been distributed among other places, mostly into the file menu. Also you don’t have to hack the text file anymore to enable the CUDA hardware that has not been certified – you will only get a little warning, but the GPU mode will be turned on.
As far as exporting goes, it is now possible to make Premiere import the exported clip or still into the project by itself, which is a great timesaver.
What’s still lacking
However great the changes, there are also several things that did not make into this release, to the chagrin of quite a lot of users. We did not get the improved project management which would allow converting and trimming the footage. This is a major bummer, since – as I wrote in another note about the SpeedGrade – it looks that I’m stuck with Resolve for the time being, and it is necessary to transcode the XDCAM EX footage that I routinely work with into something that Resolve will be able to play with, like DNxHD. The need to manually conform and transcode more material, than necessary, is a major timewaster.
I am still waiting for the Pixel Motion to be implemented in Premiere, not even mentioning the scripting. Title tool is in need of replacement, as is the ages old transitions interface.
Conclusion
In general, this is a huge milestone for Premiere Pro, which makes it now even more viable as the tool for editors of any sort. Even if some of the changes look like the work in progress, none of them seem to give any warning signs that the software is heading in the wrong direction. On the contrary, the number and quality of updates seem to confirm the dedication that Adobe has towards making their flagship NLE “the Photoshop of video”.
Note, that I have not even mentioned Adobe Anywhere in this post. To this technology I did not have any access, which also meant that I was free to speculate about it in my other blognotes. But even without including it amongst the features offered by the new version of Premiere, the upgrade is well worth it, and getting it should be a no-brainer to any user of Premiere. Or Final Cut, and Avid for that matter.
More information on Premiere Pro reveal can be found here at official Adobe NAB reveal site. Also, Josh from reTooled.net has a great overview of most of the new features in Premiere Pro and After Effects with video tutorials.