Like last year around NAB, this time Adobe announced the preview of the upcoming release of its Digital Video Applications (DVA) which include Premiere Pro, After Effects, SpeedGrade, Media Encoder, Prelude and Audition.
You can read the general overview of the new features in a few places (Creative Cow, fxguide, Studio Daily), various Adobe blogs give you a complete overview of the upcoming features, Scott Simmons at ProVideoCoalition gives a more indepth look into the new features of Premiere Pro itself, and for those visually oriented, Josh from reTooled.net prepared a video. Here as usual I will attempt to give you a bit more nuanced view with a possible long-term impact on the real world workflows. I also hope to showcase some of the most important ones in more detail pretty soon, and our favorite NLE will enjoy a separate detailed post. Right now let’s take a view from a few stories high.
The overall theme of this upcoming release is something that I would describe with a single word: “Finally…”. Finally we have a number of features that many have been asking for – sometimes for years. I know it may sound a bit ungrateful, and it’s no secret that we all would love to have these from the very beginning. But this release seems to really deliver – features galore, big and small, all to make your life as an editor easier. Therefore, when I use the word “finally”, it means that it is really there, without “buts” and “howevers”, and with full appreciation of the required time and resources, and a long road that all had to travel to arrive at this point.
One of the more interesting developments in this cycle is the new version of Prelude with its ability to trim clips in the rough cuts (finally), and tagging. The first feature makes it feasible to do the rough cuts in Prelude without the need to precisely mark the subclips, or to adjust the selections on the fly. We can finally do the quick assemblies, selects, what have you, and we can be as OCD about them, as we want.
Tagging, the second feature, has tremendous potential, similar to Keywords Collections in Final Cut Pro X. The ability to apply tags during playback using a fully customizable, state-of-the-art, JSON driven Tag Panel or to apply several tags to a single marker makes logging much easier and much faster. This is precisely what was missing in the metadata workflow between Adobe applications. Therefore we finally have a non-hierarchical way to quickly and consistently annotate the source footage. In the preview software versions that I had access to, tags are currently searchable only in Prelude, and only on the clip basis via the search box in the project panel. Hopefully, this is going to trickle down at least to Premiere, which can already see the tags, but can’t yet look for them or show them in any meaningful way, and that the searching capabilities will become more advanced.
On a technical note, tagging is implemented via an interesting extension of Flash Cue markers, and I will definitely elaborate on it soon. Right now, if you for some reason feel unhappy that the FLV format is being totally ditched from Adobe video applications in this upcoming release, you can comfort yourself with the knowledge, that not everything Flash-related is going to waste.
There are a few other new features that span throughout several CC applications. For one, Premiere and SpeedGrade now sport the Master Clip Effects (MCE). The idea is quite simple – when you apply an effect to a given clip, not to its instance in the timeline, it is applied as a separate “layer”, so to speak, below all timeline effects, and ripples through all instances of the master clips on all timelines in the project. It’s a great feature, especially useful with color correction, and the fact that SpeedGrade can also work in this mode, makes it even better. Here however I am not saying “finally”, because there seem to be a few quirks associated with it. I will elaborate on them in a separate Premiere Pro note, perhaps even wait for the release version of the software to see how these issues are resolved.
Regrettably, Master Clip Effects do not apply to sequences – yet? – which would make them totally awesome. This, and the possibility to render and replace such modified master clip or a sequence to the codec of one’s choosing. But even without it, it’s a killer.
The mechanism used for MCE allowed also Adobe to create the Live Text Templating for After Effects compositions in Premiere. Here we can see the roll-out of a 1.0 release of a feature, which covers only the most basic – though also the most frequently requested – ability to edit a selected text layers of Dynamically Linked AE comps straight in Premiere Pro. It’s a boon for all lower thirds, titles and similar graphics. It’s pretty simple to work with – you mark your composition as a Premiere template in the comp settings, and then any unlocked text layer in this composition or pre-comps (very clever!) is going to be accessible in Premiere in the same way MCEs are – by using match frame on the timeline clip or opening it in the Source Monitor, and then looking up the Effect Control Panel.
The drawback of Live Text Templates using MCE mechanism is that, if you want to duplicate this composition in the timeline, it will duplicate the clip in the Project Panel, similarly to how Titles currently work. This perhaps is not the most elegant solution – ideally we’d only have a single template, and only adjust the effects on the instances in the timeline – but it does work, and the link to the original AE composition remains, you can easily change anything in it in After Effects, and the changes will propagate to Premiere. Of course, it is not the final word in terms of templating. If you have comments or ideas, make sure to send them to Adobe, I know they are listening.
Next, both Premiere Pro and After Effects can now contain their effects using masks. Here I can definitely say “finally!”, at least when it comes to Premiere. Finally you can create a vignette or limit your color correction using a mask. Such masks can also be tracked, using the same technology that was already available in After Effects for past half a year. It works and it’s great. There is a minor limitation – currently there are only two types of masks present in Premiere – elliptical or polygonal. No bezier shapes or variable feathering, to access these you still need to go to After Effects. But these two types of masks will suffice for the usual 80% of cases, especially given the controls to expand or uniformly feather the mask.
Interestingly, the implementation in Premiere Pro seems much easier and much more elegant than its After Effects counterpart. While masks in Premiere are shown under each effect, AE requires you to navigate your timeline, make sure your effects masks do not interfere with masks that you apply to the layer, and so on. Quite a few inelegant steps on the way. The only positive side is that you can reuse these masks for multiple effects, which is not possible in Premiere. But the masks do carry over when you send a clip to AE via Dynamic Link, which is also a welcome addition.
Thanks to these features suddenly a lot of things became much easier to achieve in Premiere itself, without the use of Dynamic Link or After Effects round-tripping, especially in the Motion Graphics area. The only large things currently missing here are Pixel Motion algorithm for speed changes, and Motion Blur. About the impact of this release on the future of Creative Impatience plugins I’m going to elaborate in another note.
One of the best features in the upcoming Premiere Pro is the improved performance of the search field in the project panel. Yes, it seems tiny in comparison to all other loudly touted upgrades, and it’s more of a fix, than a marketable feature. But it means that finally we will be able to use the search box in larger projects, and that is no small change. On similar note, marker names will finally be visible in the marker panel, and can be searched for. For the list of all the features see Premiere’s blog, and an upcoming post on this website.
Astute readers and long time users of Premiere had most likely already noticed one feature that is sorely missing to complete the “finally” list. Unfortunately, Project Manager does not get an update in the upcoming release, and we will not be able to easily transcode or trim our projects either for archive or exchange. If I had to name a major disappointment, this would be the one. Here’s to hope that we’ll see some working solution soon – IBC perhaps?
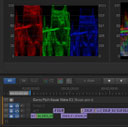
But enough complaining. On another front, SpeedGrade seems to have finally received support for AMD GPUs in the Direct Link mode, including dual GPUs – owners of new Mac Pros rejoice – a new YUV vectroscope that works like every other vectroscope on the planet, and sports a decent graticule, a control to clamp the scopes instead of resizing them, and vertical sliders supplementing the offset/gamma/gain rings, easier to access and manipulate with a mouse. Some keyboard shortcuts became unified with the ones present in Premiere, and you can also enable or disable any track in the timeline in the Direct Link mode, which previously was impossible, making it easier to consider various grading options or simply hide distracting elements.
Media Encoder can finally be installed separately from other applications, which should make reinstalling and troubleshooting much easier, in case you ever need to do that, and apart from a number of bug fixes it also added support for industry standard AS-11 DPP, which you will never need unless you are delivering Broadcast material to UK, and – perhaps more importantly – encoding unencrypted DCP, which will be helpful if you’re going to submit your great movie to a film festival. Now, if only we had access to DCI P3 color space in Premiere…
Audition received a modest update as well – support for Dolby Digital, multichannel wav files, and some multitrack enhancements that should make your life easier if your sessions stretch vertically enough for you to consider turning your monitor short edge up.
Finally, After Effects enjoys integrated Mercury Transmit for live preview, support for HTML5 third-party panels (can be pretty significant in the long run), some updates to Curves effect (still not compatible with Premiere’s RGB Curves though), and an interesting technology for improving the mattes that you get from Keylight or other keying effects. Both will definitely come in handy, especially since I’m right now involved heavily with Hero Punk project which was shot totally on green screen.
There are also updates to Story and Anywhere, but I can’t meaningfully comment on either.
All in all, it looks like it’s going to be a pretty solid release, centered on Premiere Pro. Dare I say – finally? 😉


